This guide will help you integrate Citeway into your website. To do so, you'll start by setting up an account, and continue by configuring a profile for your company, and adding two blocks of code on your website editor. After this, you won't have to worry about doing any other technical actions, as all your preferences and customizations will be managed through you dashboard page on the Citeway website.
This integration setup will allow your website to connect with Citeway so that the banners appear automatically on your site. Once you've finished following the steps listed on this page, your visitors will start seeing the different banners selected for your business.
Besides the integration process, you can also find at the end of this guide an explanation on how to create self-edited banners to display on your site. These banners are private and uniquely used on your website, and benefit from the A/B testing and measurement capabilities that Citeway offers.
We'll start the integration by creating a Citeway account. If you haven't already registered, go to the registration page and create an account. After doing so, you'll be redirected to a page to select your preferred subscription plan. You don't have to wait until registering to see the different subscription options Citeway offers. If you want to give it a check now, you can go to the pricing page and see which plan fulfils your company's needs better.
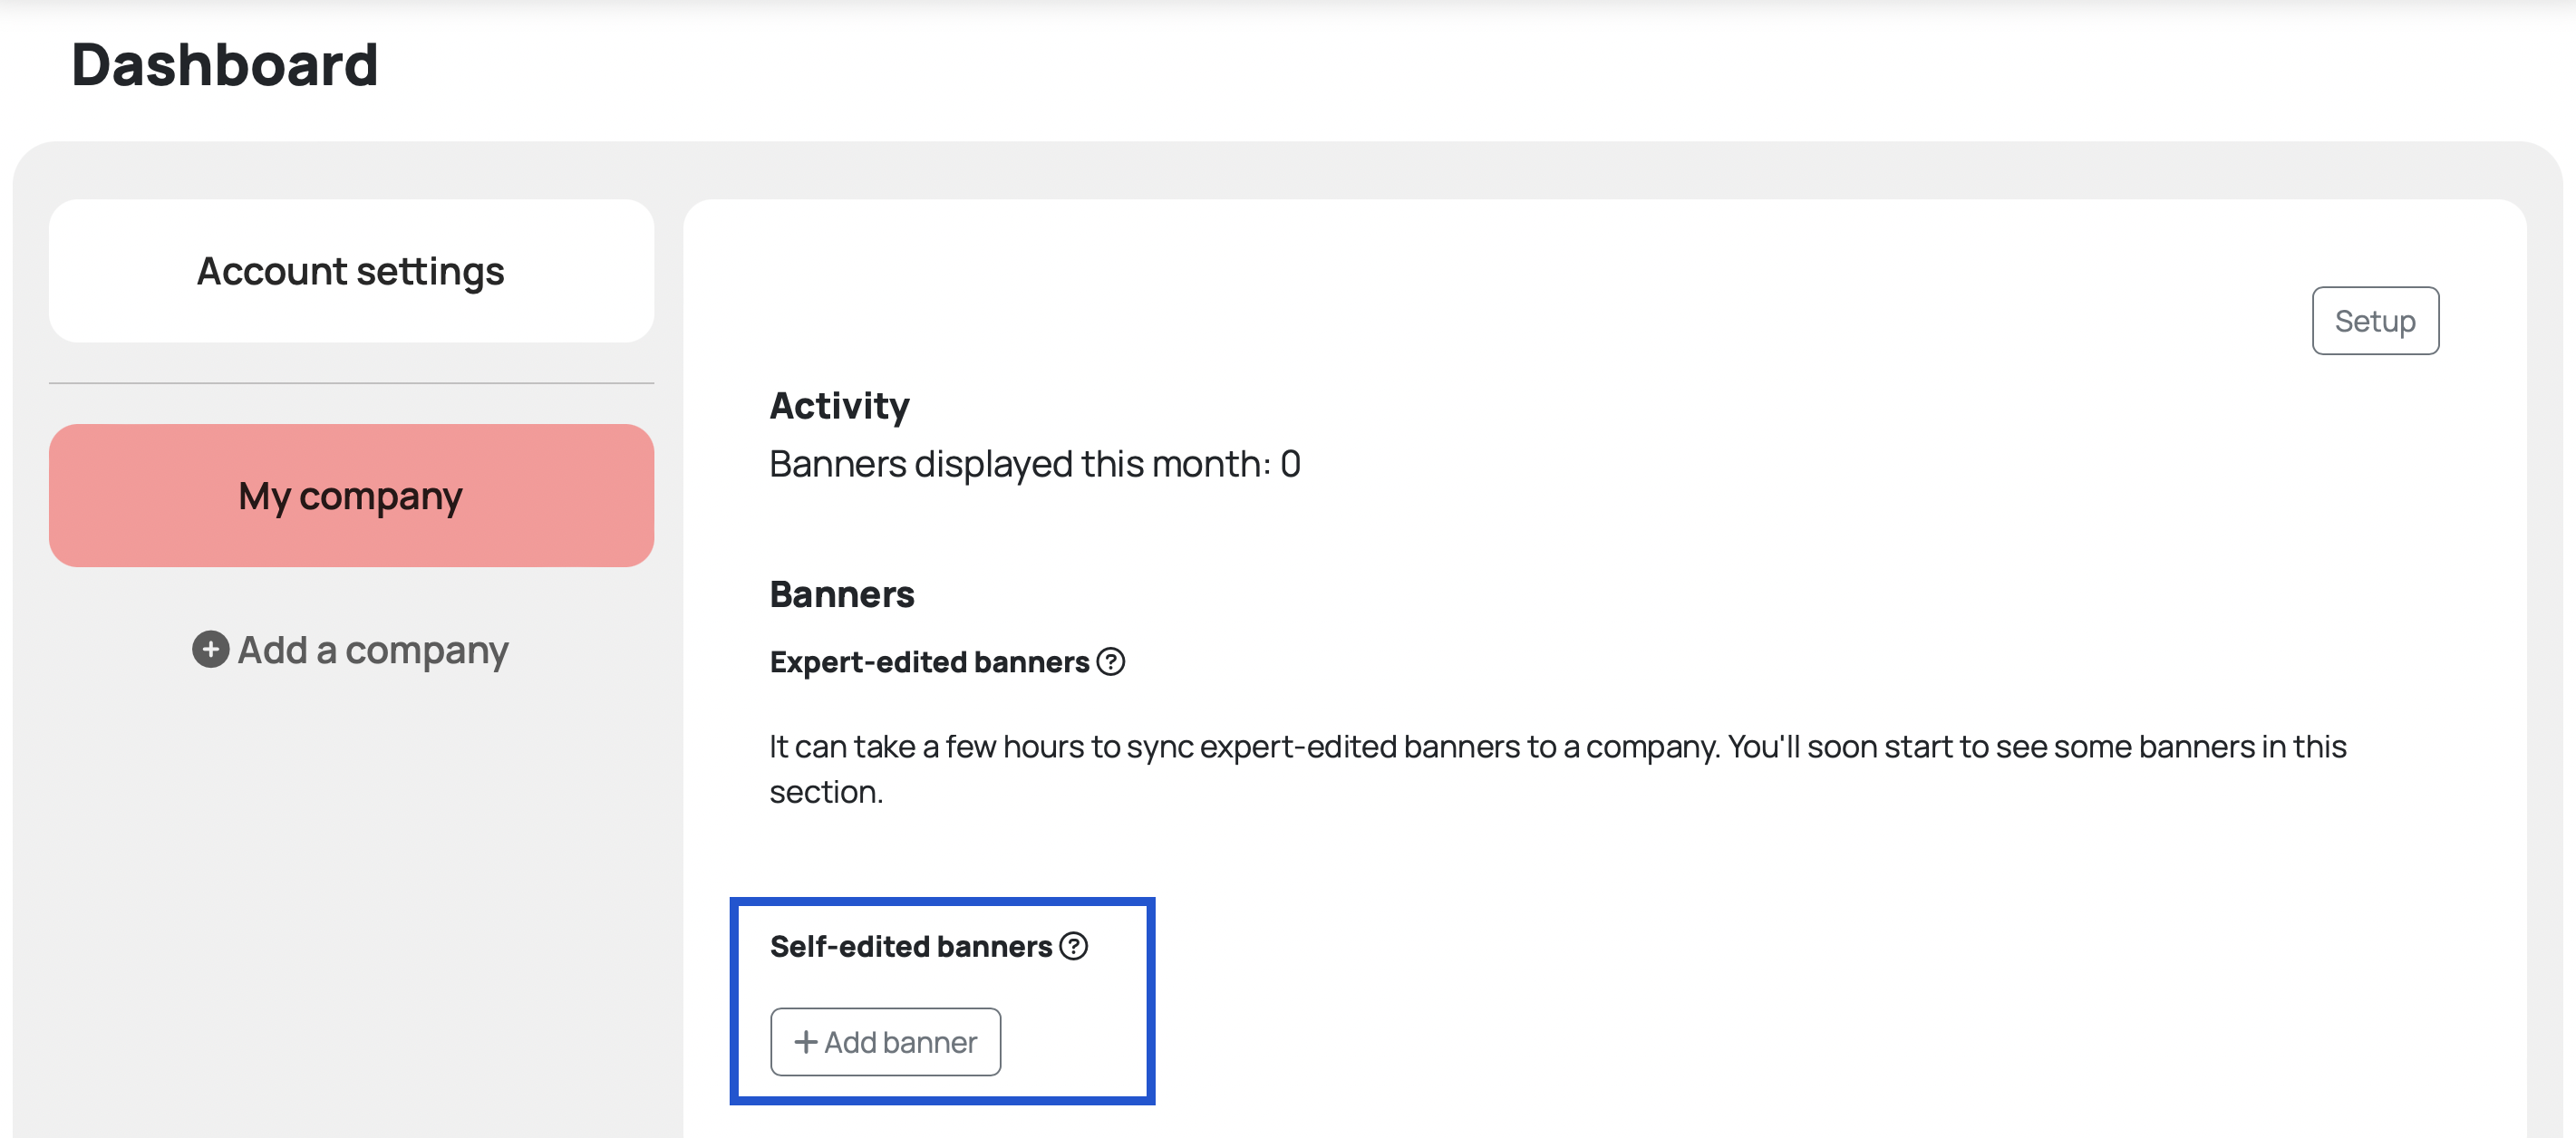
Once you've selected a plan, you'll be automatically redirected to your dashboard page. This page is your command center, where you'll manage all your preferences about Citeway. If you haven't registered or selected a subscription plan, you won't be able to perform any actions on your dashboard, so make sure to finish those steps first before you continue with this guide.

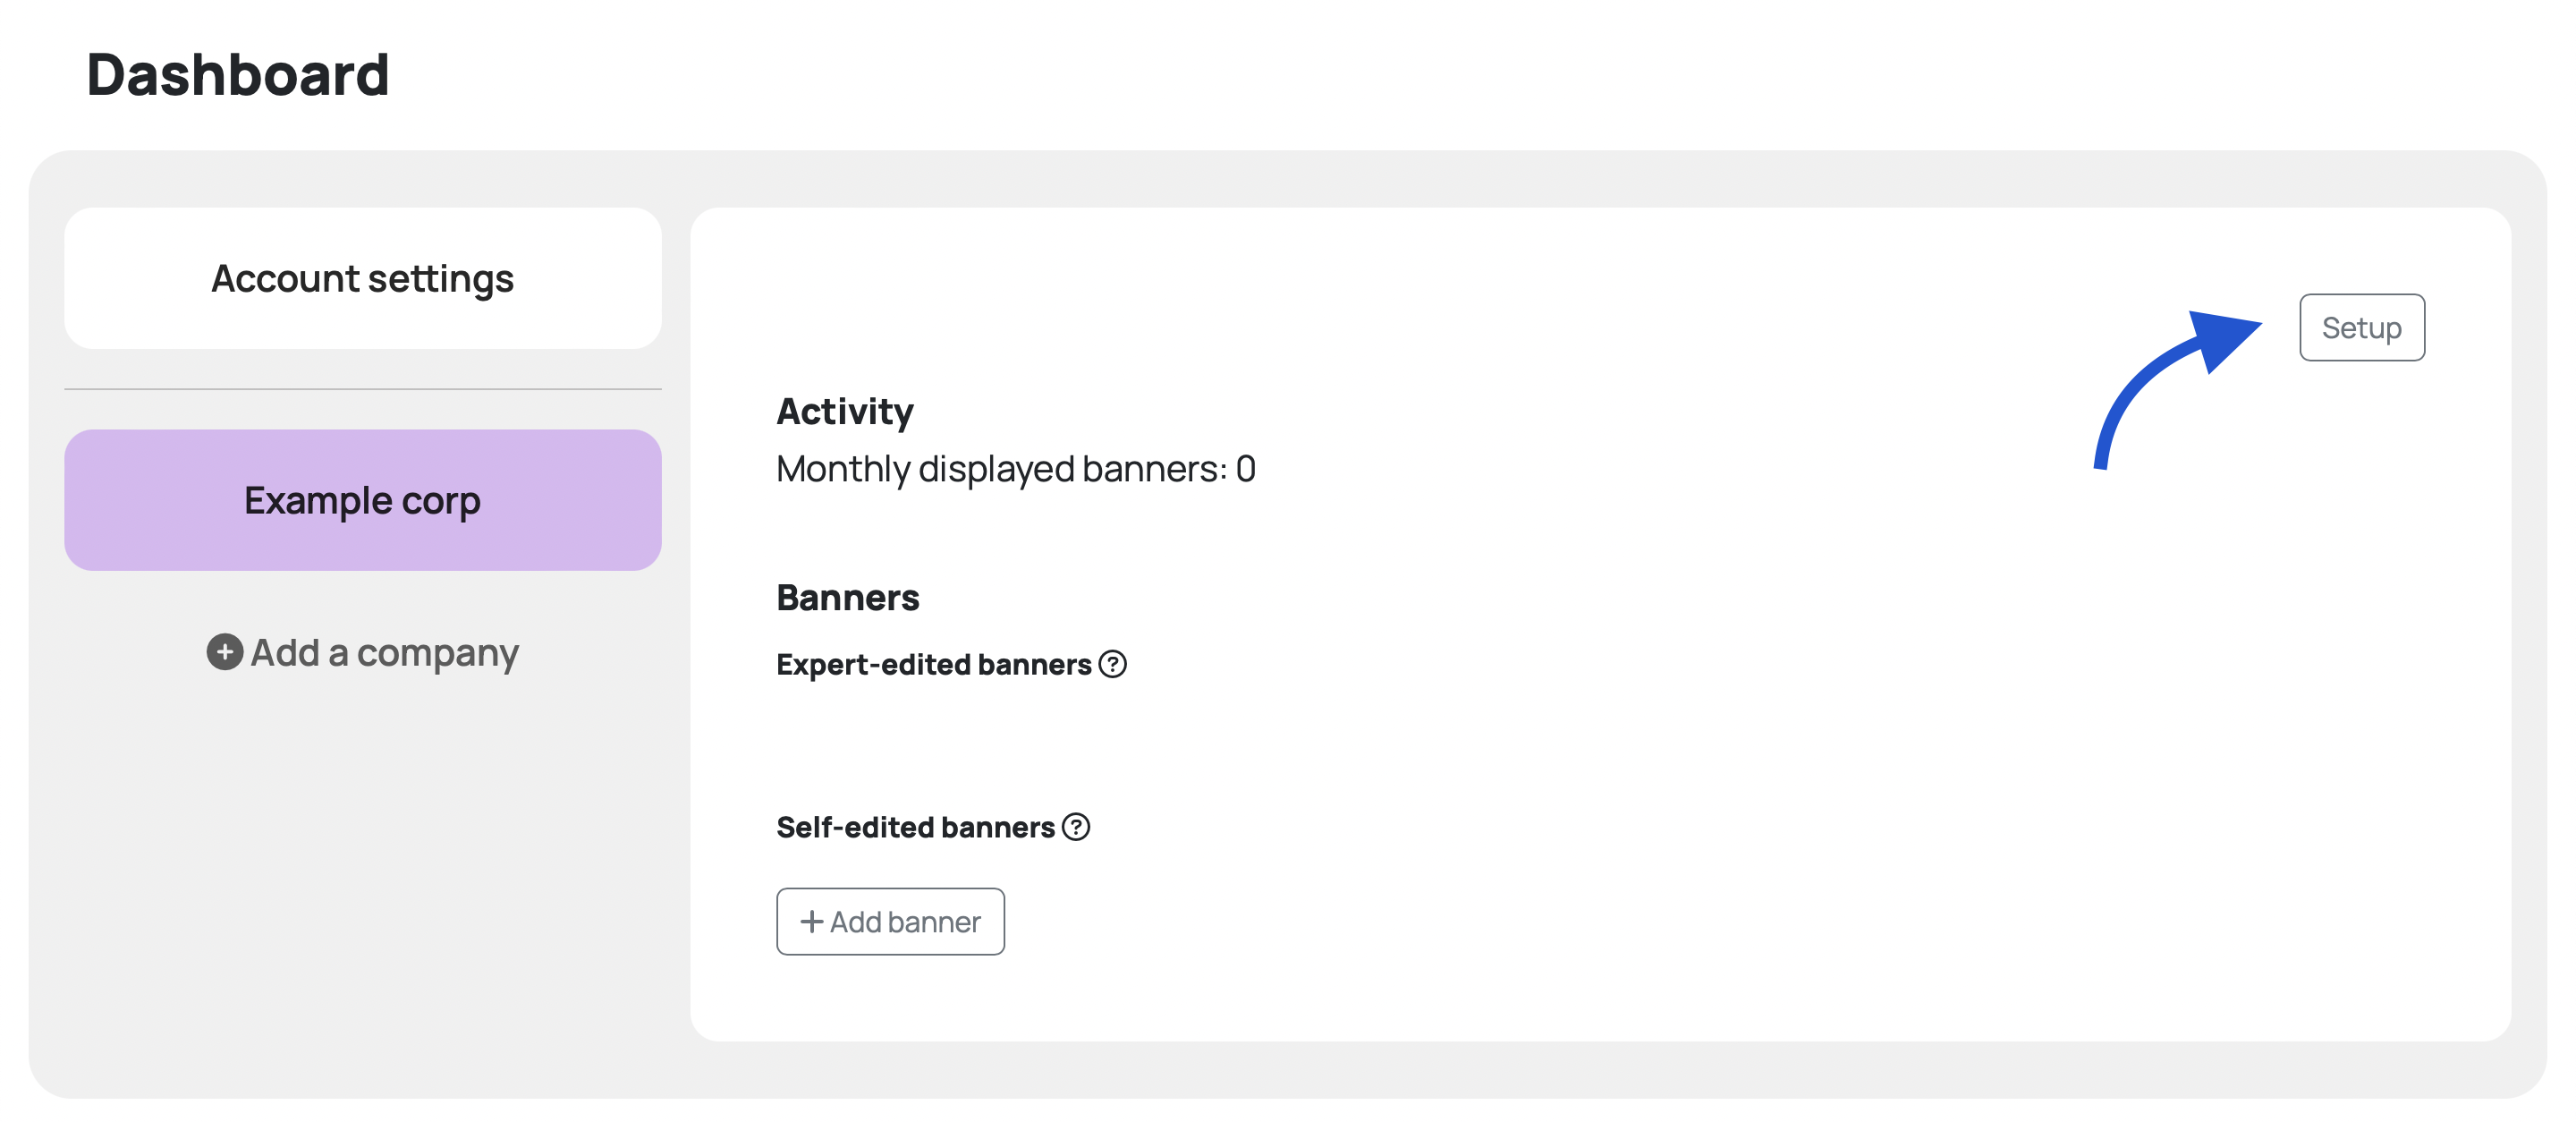
After registering and selecting a plan, you'll be able to add a new company to your dashboard. Because you can use Citeway with different companies/websites that may have different preferences, each one of them has their own profile with its individual settings. You can now click on the "Add a company" button and introduce the name of your company. Once you do that, you'll see a new entry on your dashboard menu that will let you access your company's preferences. Click your newly created company profile on the menu to access its preferences, and select its setup button.
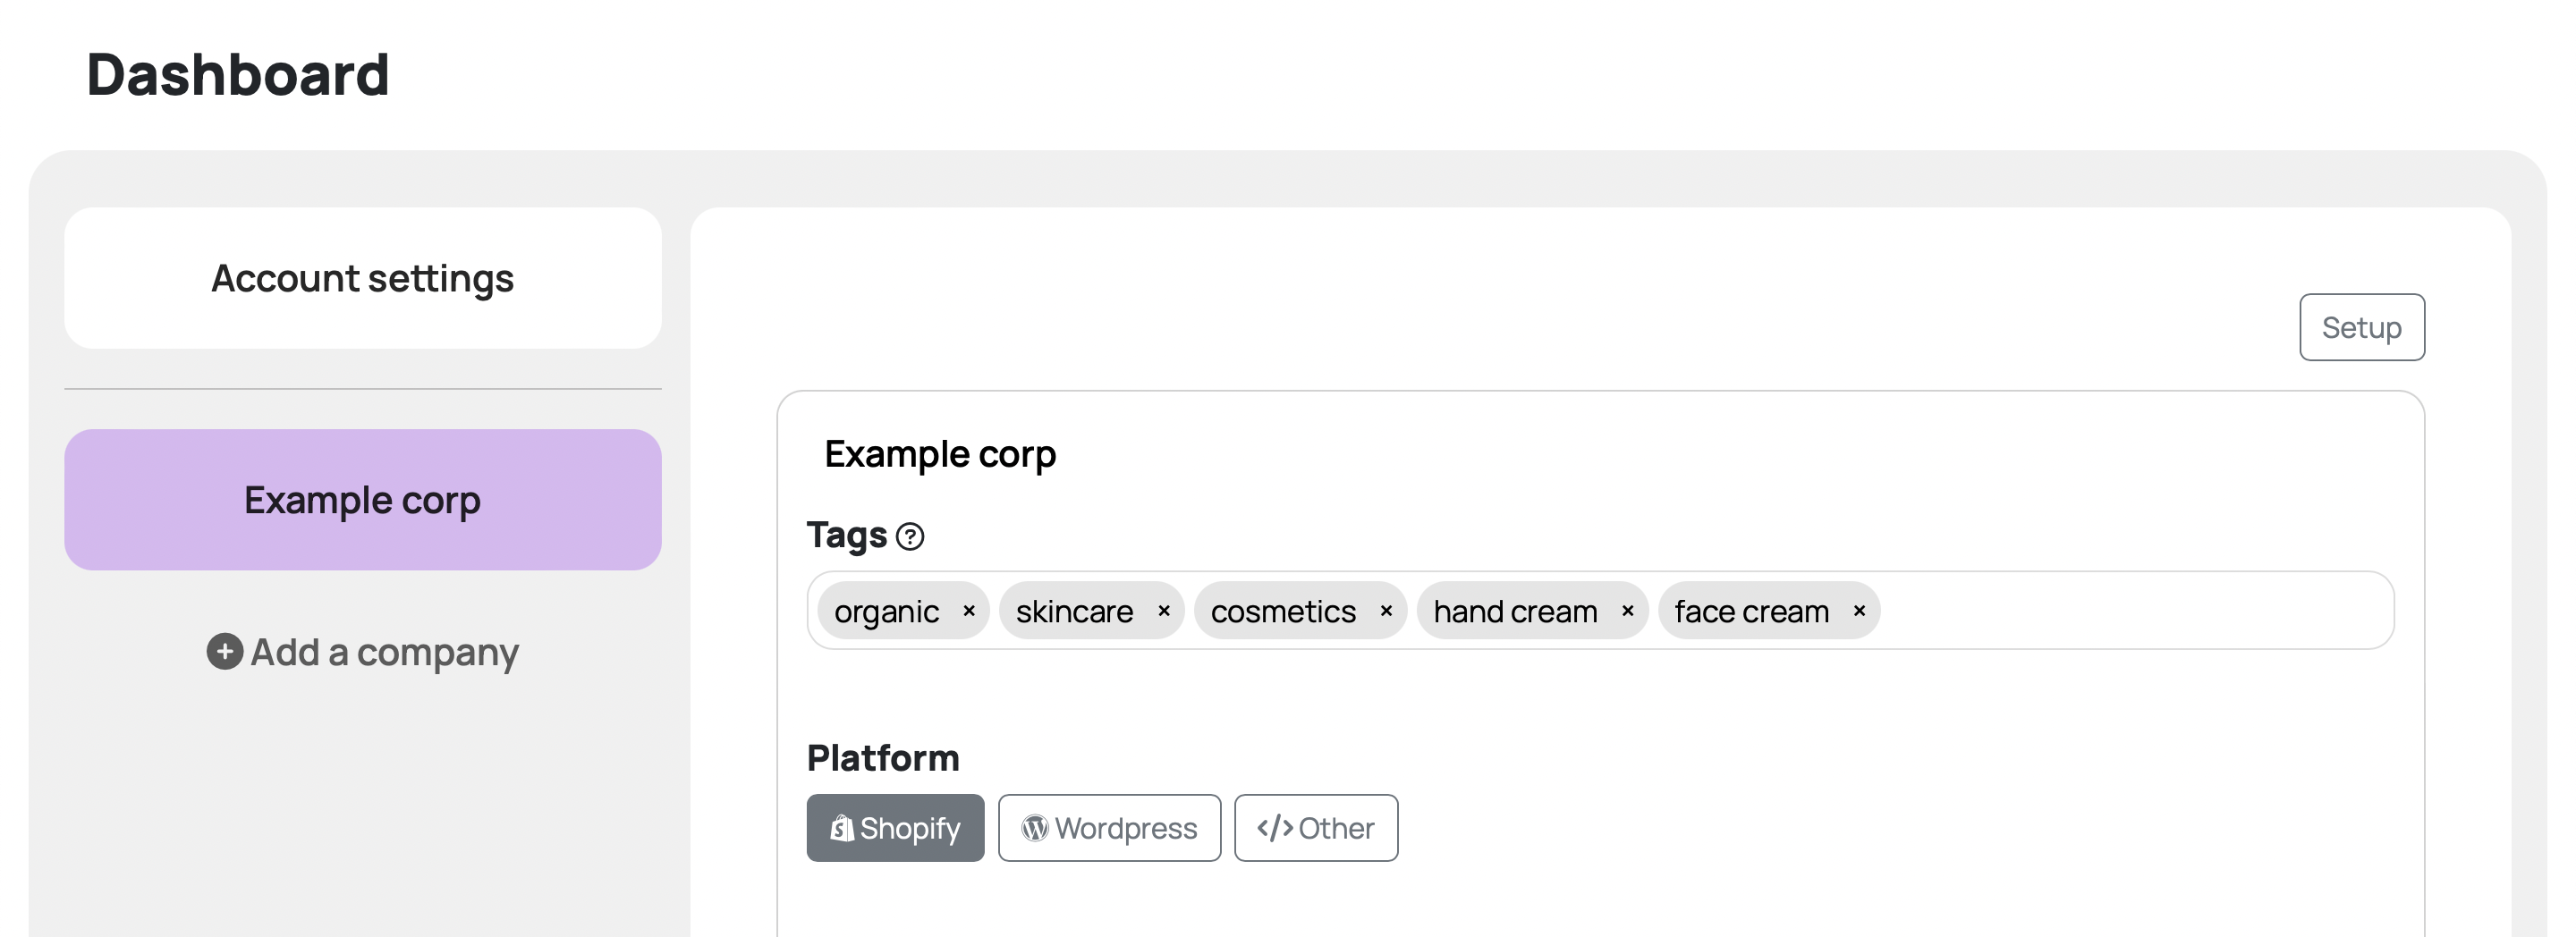
The first thing you find when entering you company's setup interface is the Tags input bar. There, you should add as many tags as you feel necessary to define the activity your company does. If, for example, you sell organic skincare cosmetic products, you should add tags like "organic", "skincare", and "cosmetics". Additionally, you could also add others like "face cream", "hand cream", "organic healthcare", etc. The more tags you add, the easier it will be to find proper banners that can help increase your website's conversion. There's no limit to the amount of tags you can add to each of your companies, and you can create different combinations of words if you think it will help define better what your business is about.
Below the Tags input bar, you'll be able to select the platform/technology your website is based on. Currently we differentiate between Shopify, Wordpress (it includes websites that combine it with Woocommerce), and other. The "Other" category comprises anything that can include html codeblocks, so you shouldn't have any issues finding the option that better defines your system. However, if you aren't sure if you can include Citeway into your system, send us an email at support@citeway.com and we'll guide you every step of the process.
Once you've created a company profile, included the necessary tags that define your business, and selected the platform option that your system uses, you are ready to include the bits of code that will enable the communication between Citeway servers and your website. If you haven't reached this point yet, check the previous sections where it's explained how to begin with your implementation process.
The code bits that need to be included are two: the first one is known as the "Head code block" and is used to monitor the success of the banners that are used on your website; the second one, known as the "Banner insertion code block", is used to place a banner wherever you want on your site. These concepts will be explained in more detail on the following sections.
Note: If you have jumped directly into this section, have in mind that to proceed with this step you are expected to have set up your account, created and configured a company profile, and obtained the connection blocks of code that are autogenerated on your Citeway Dashboard. If you haven't reached this level of preparation, we suggest you check the previous steps described in this integrations guide.
If you use Wordpress to build your website, follow this section to implement Citeway into it. Following the steps explained in the previous sections, you should've reached the point where you have included the tags that define your business and selected "Wordpress" as your platform.
Below the abovementioned fields related to tags and platform selection, you'll find the "Head code block" section. On it, there's a block of code that is specifically generated for your company, and that will only work for this specific website. If you were to repeat this step with different websites, new company profiles need to be created.

This block of code can be copied by clicking the Copy button. It will have to be pasted soon on your Wordpress page, so let's head there to set up the stage first.
There are plenty of free plugins that help you add code to the <head> section of
your Wordpress website. Based on number of installs and
review scoring, we recommend "WPCode - Insert Headers and Footers + Custom Code Snippets - WordPress Code Manager"
by WPCode. To find it, go to your Wordpress Admin Panel,
click on the Plugins section of your left sidebar menu, and select Add New Plugin. Once there, type "wpcode insert
headers" on the search bar to find the plugin.
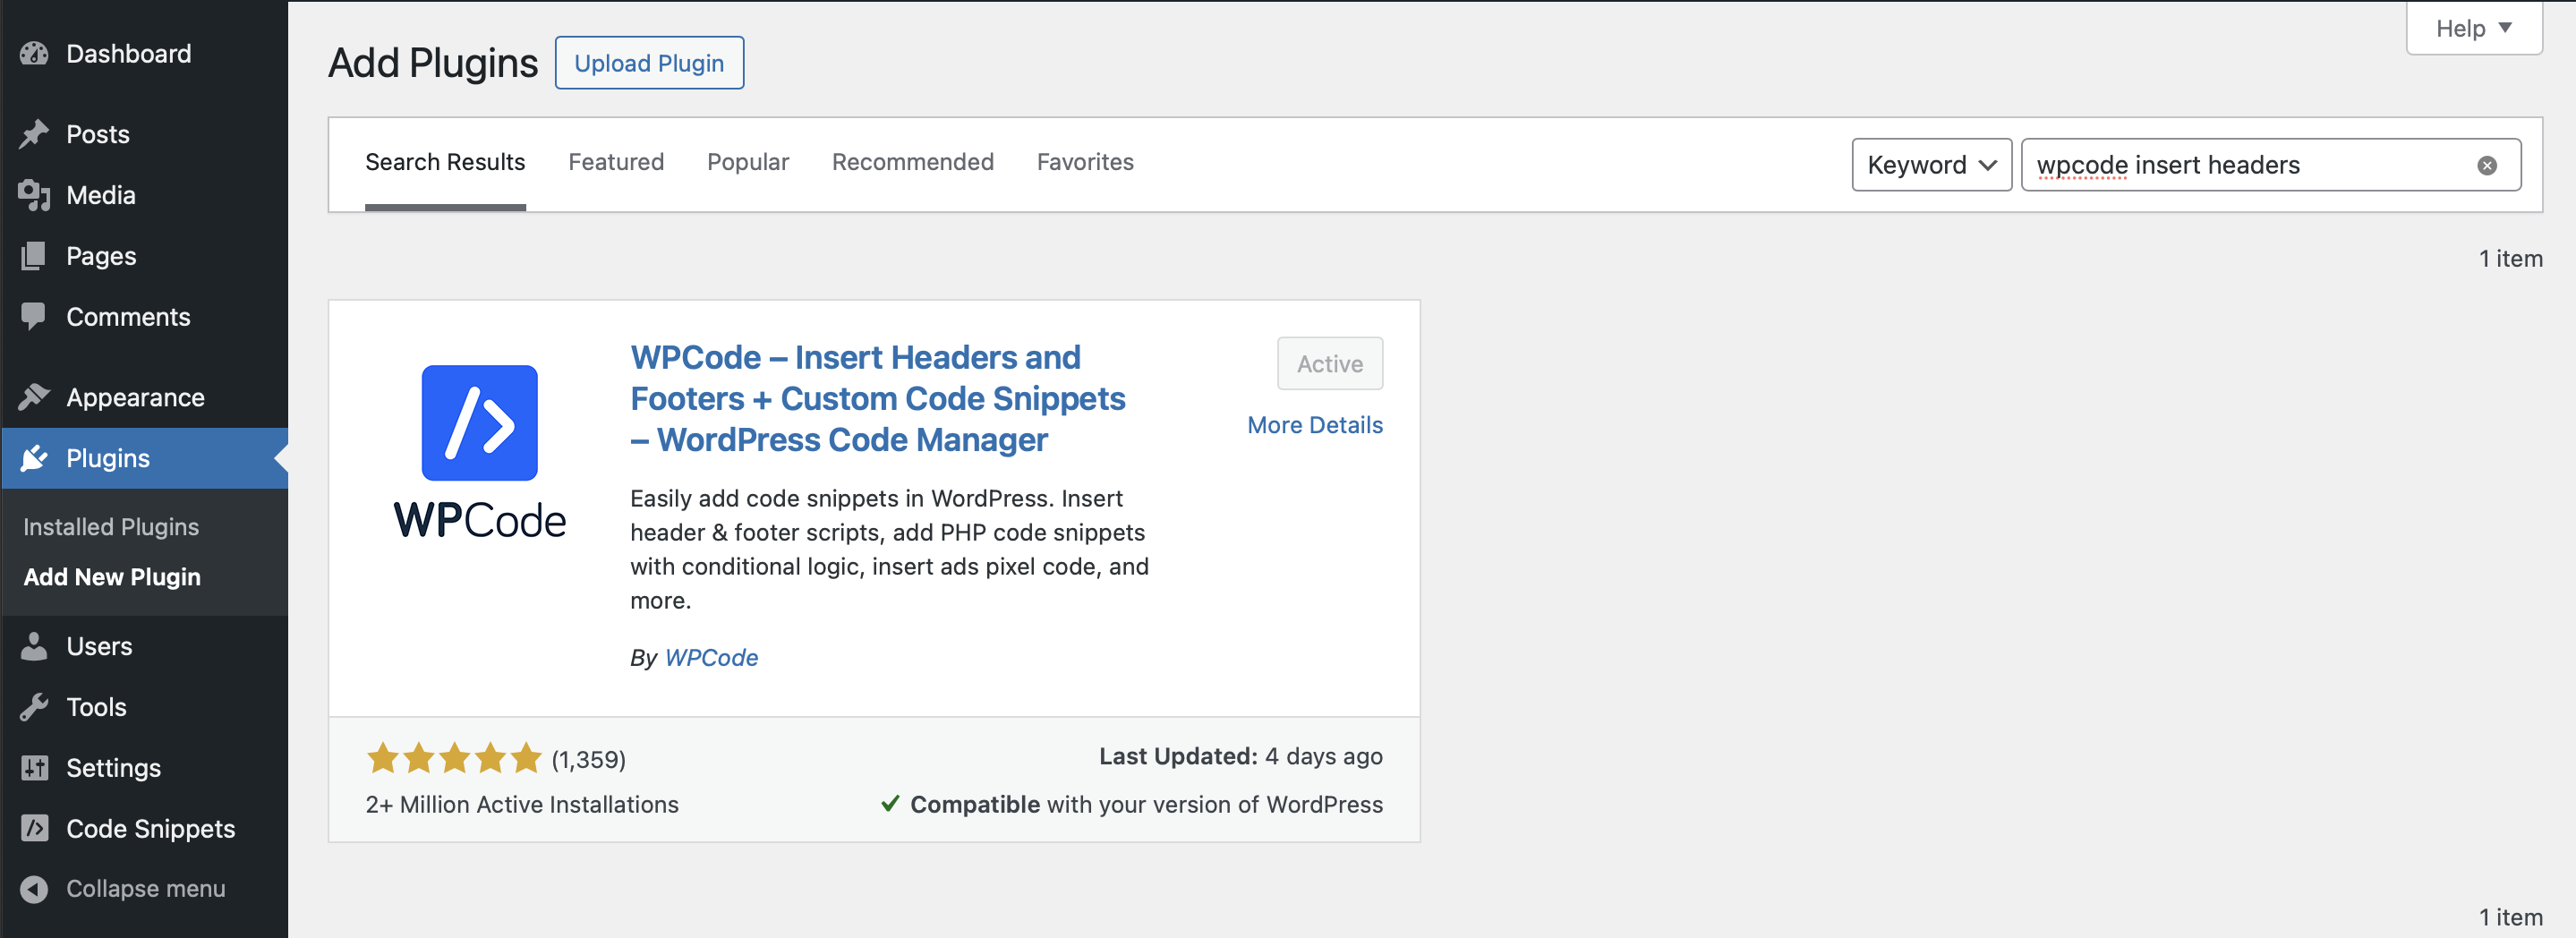
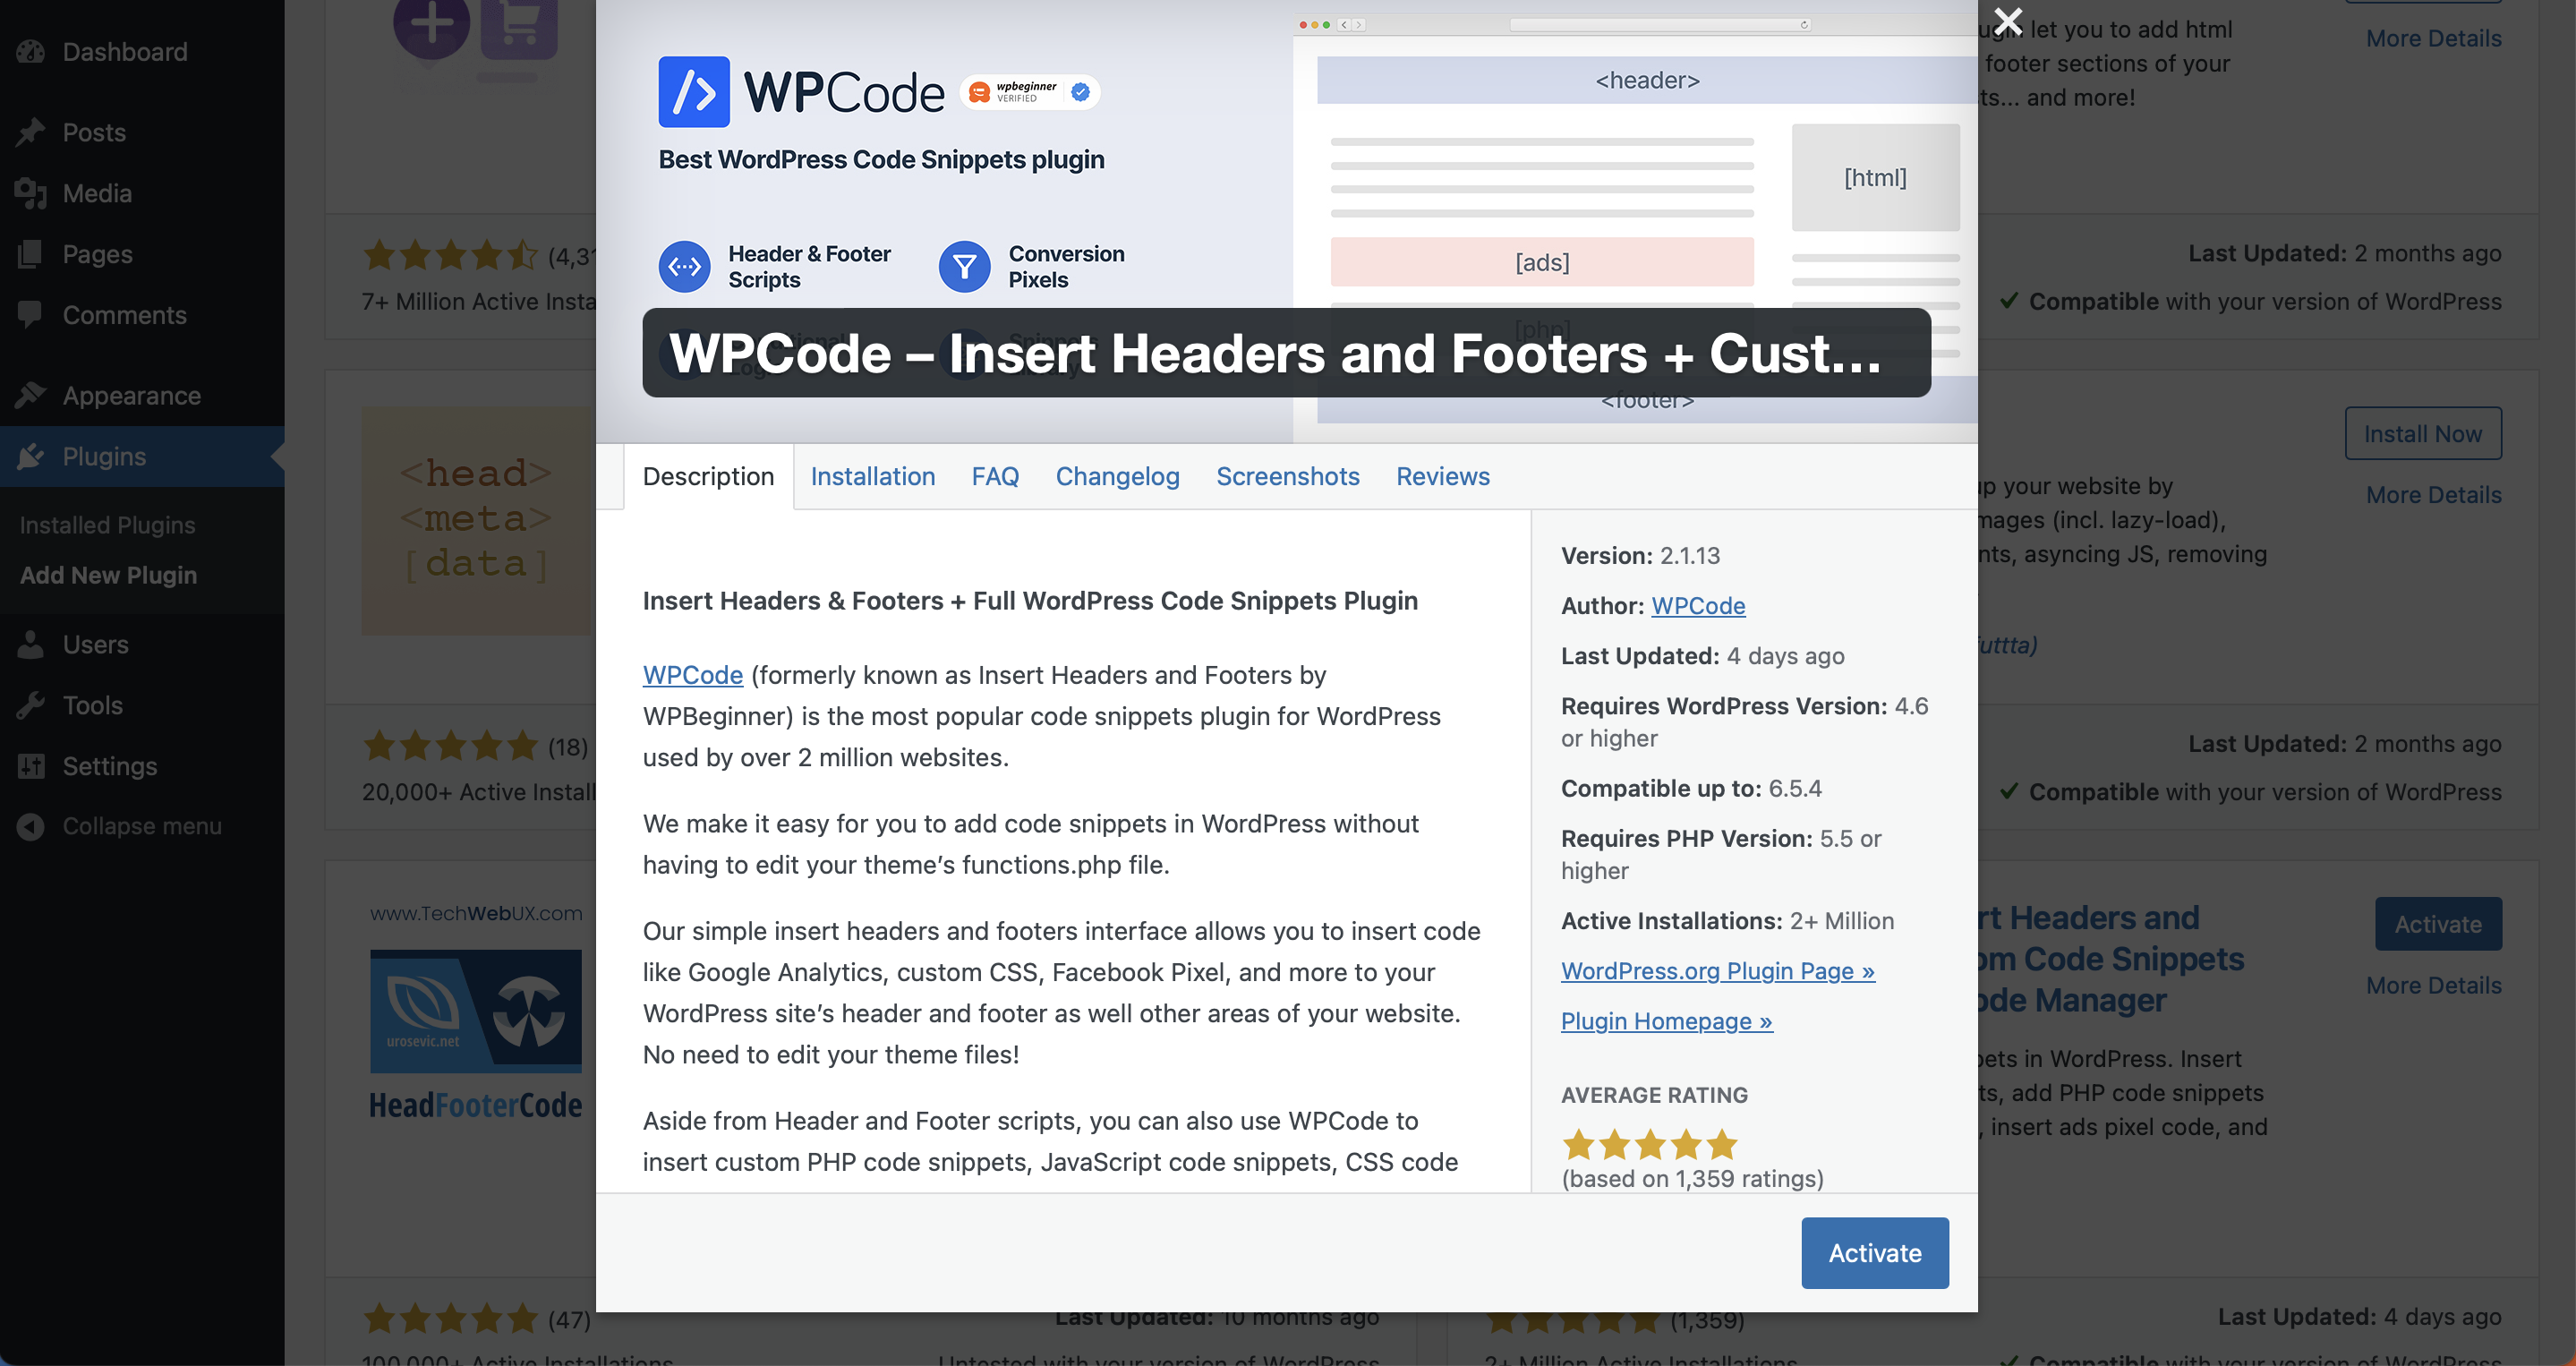
Once you find the plugin, click the install button and wait for it to be installed on your Wordpress site. Afterwards, click the activate button for it to be active on your website.
Once the plugin is installed and activated, you'll be able to access it at the bottom of your left sidebar menu, on the Wordpress Admin Panel, as "Code Snippets".
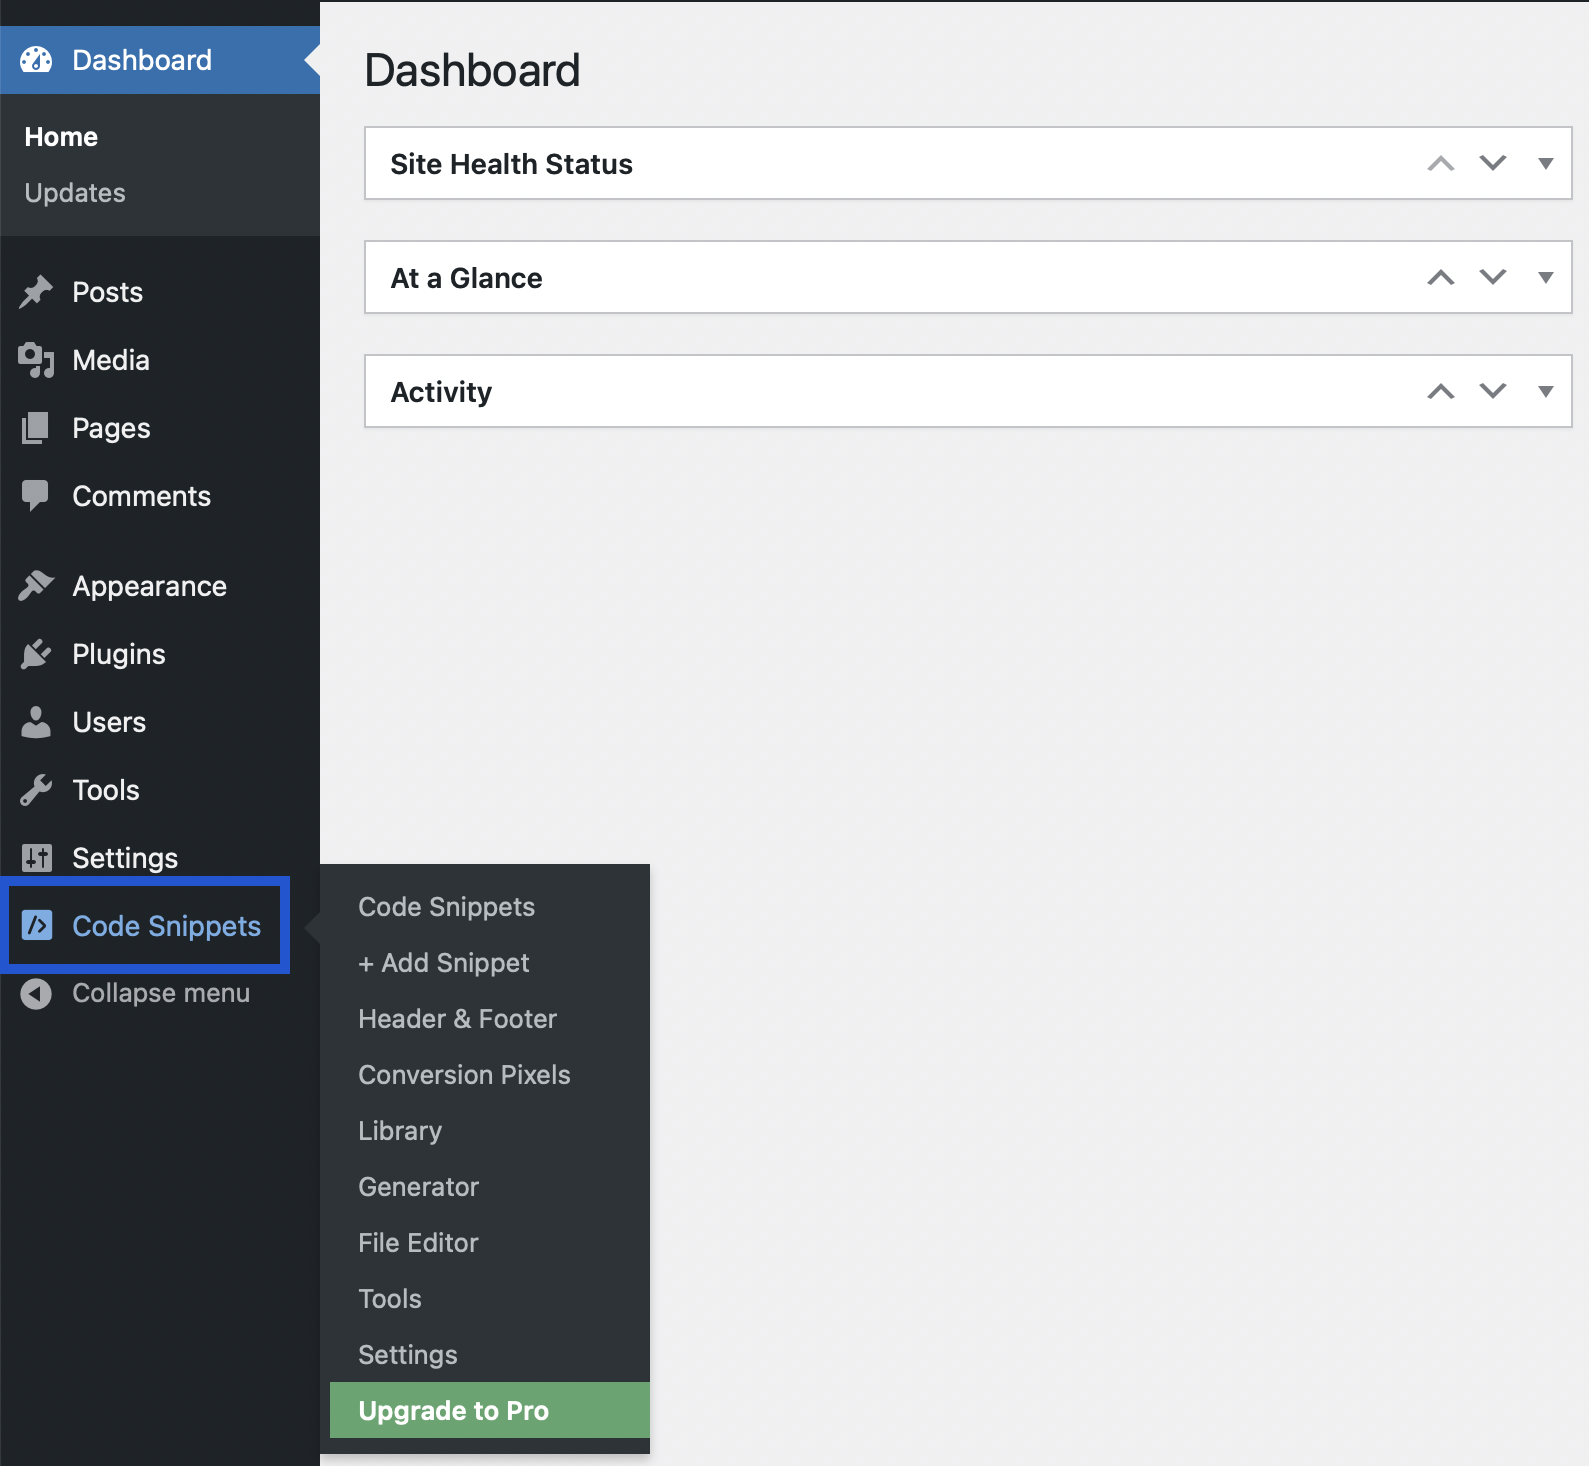
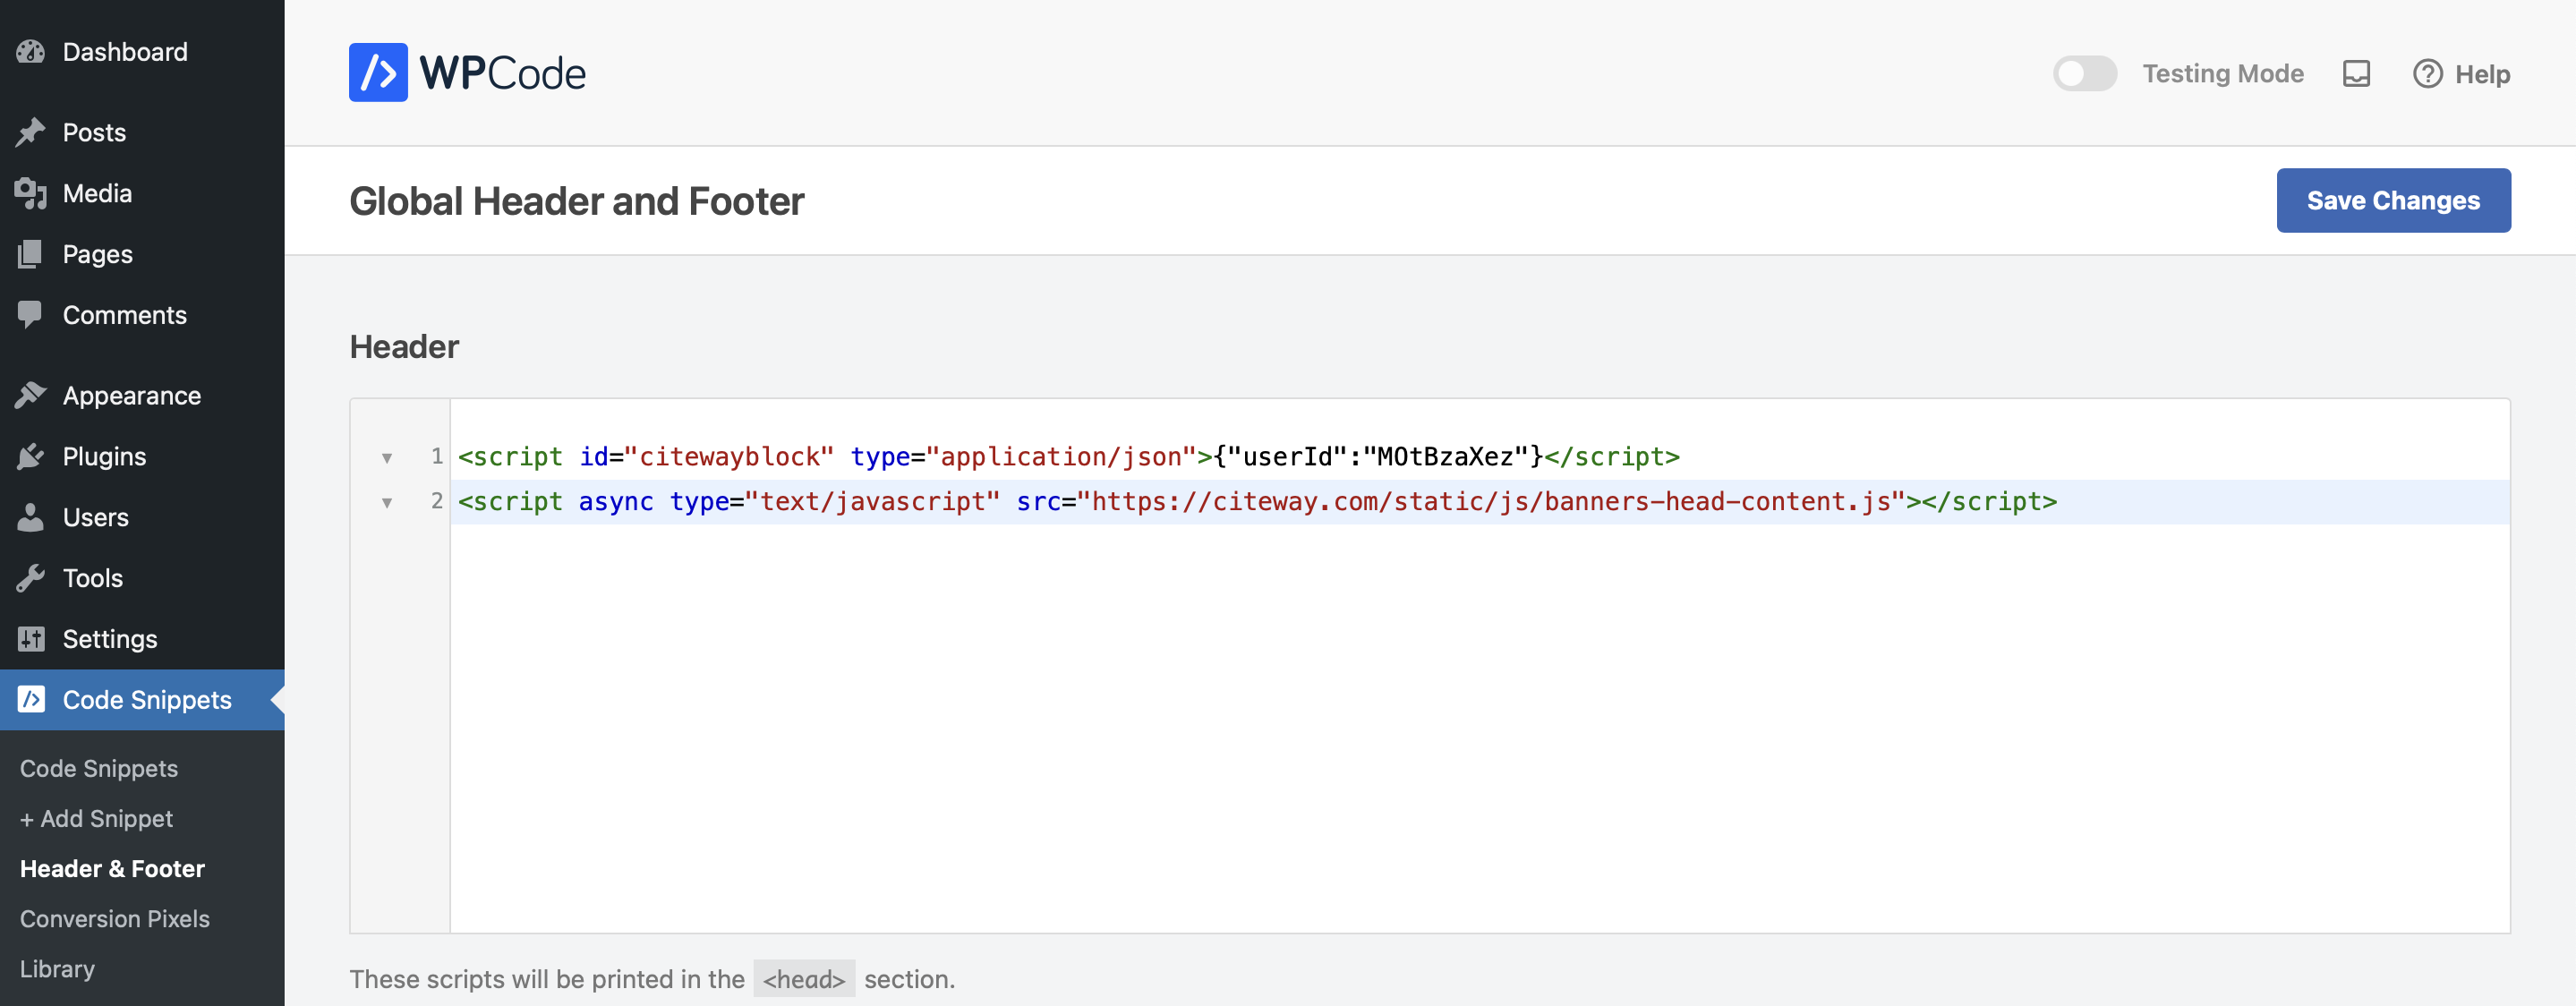
In the Code Snippets section from the sidebar menu, click on the Header & Footer button. This will allow you to
include additional code to the <head>
section of your website. Copy the "Head code block" from your Citeway dashboard and paste it into the Header
section. After doing so, remember to save your changes by clicking the
Save button.
Now that the Head code block has been inserted and activated, the "difficult" part is over. For the next steps, you'll see that all that's left to be done is choose where you want to place a Citeway banner, and paste some code. Let's do it step by step to see how it's done.
As simple as it sounds, just head to your Citeway dashboard, and below the Head code block you'll find the Banner insertion code block. Click on the Copy button for the latter so that you can paste it in Wordpress.
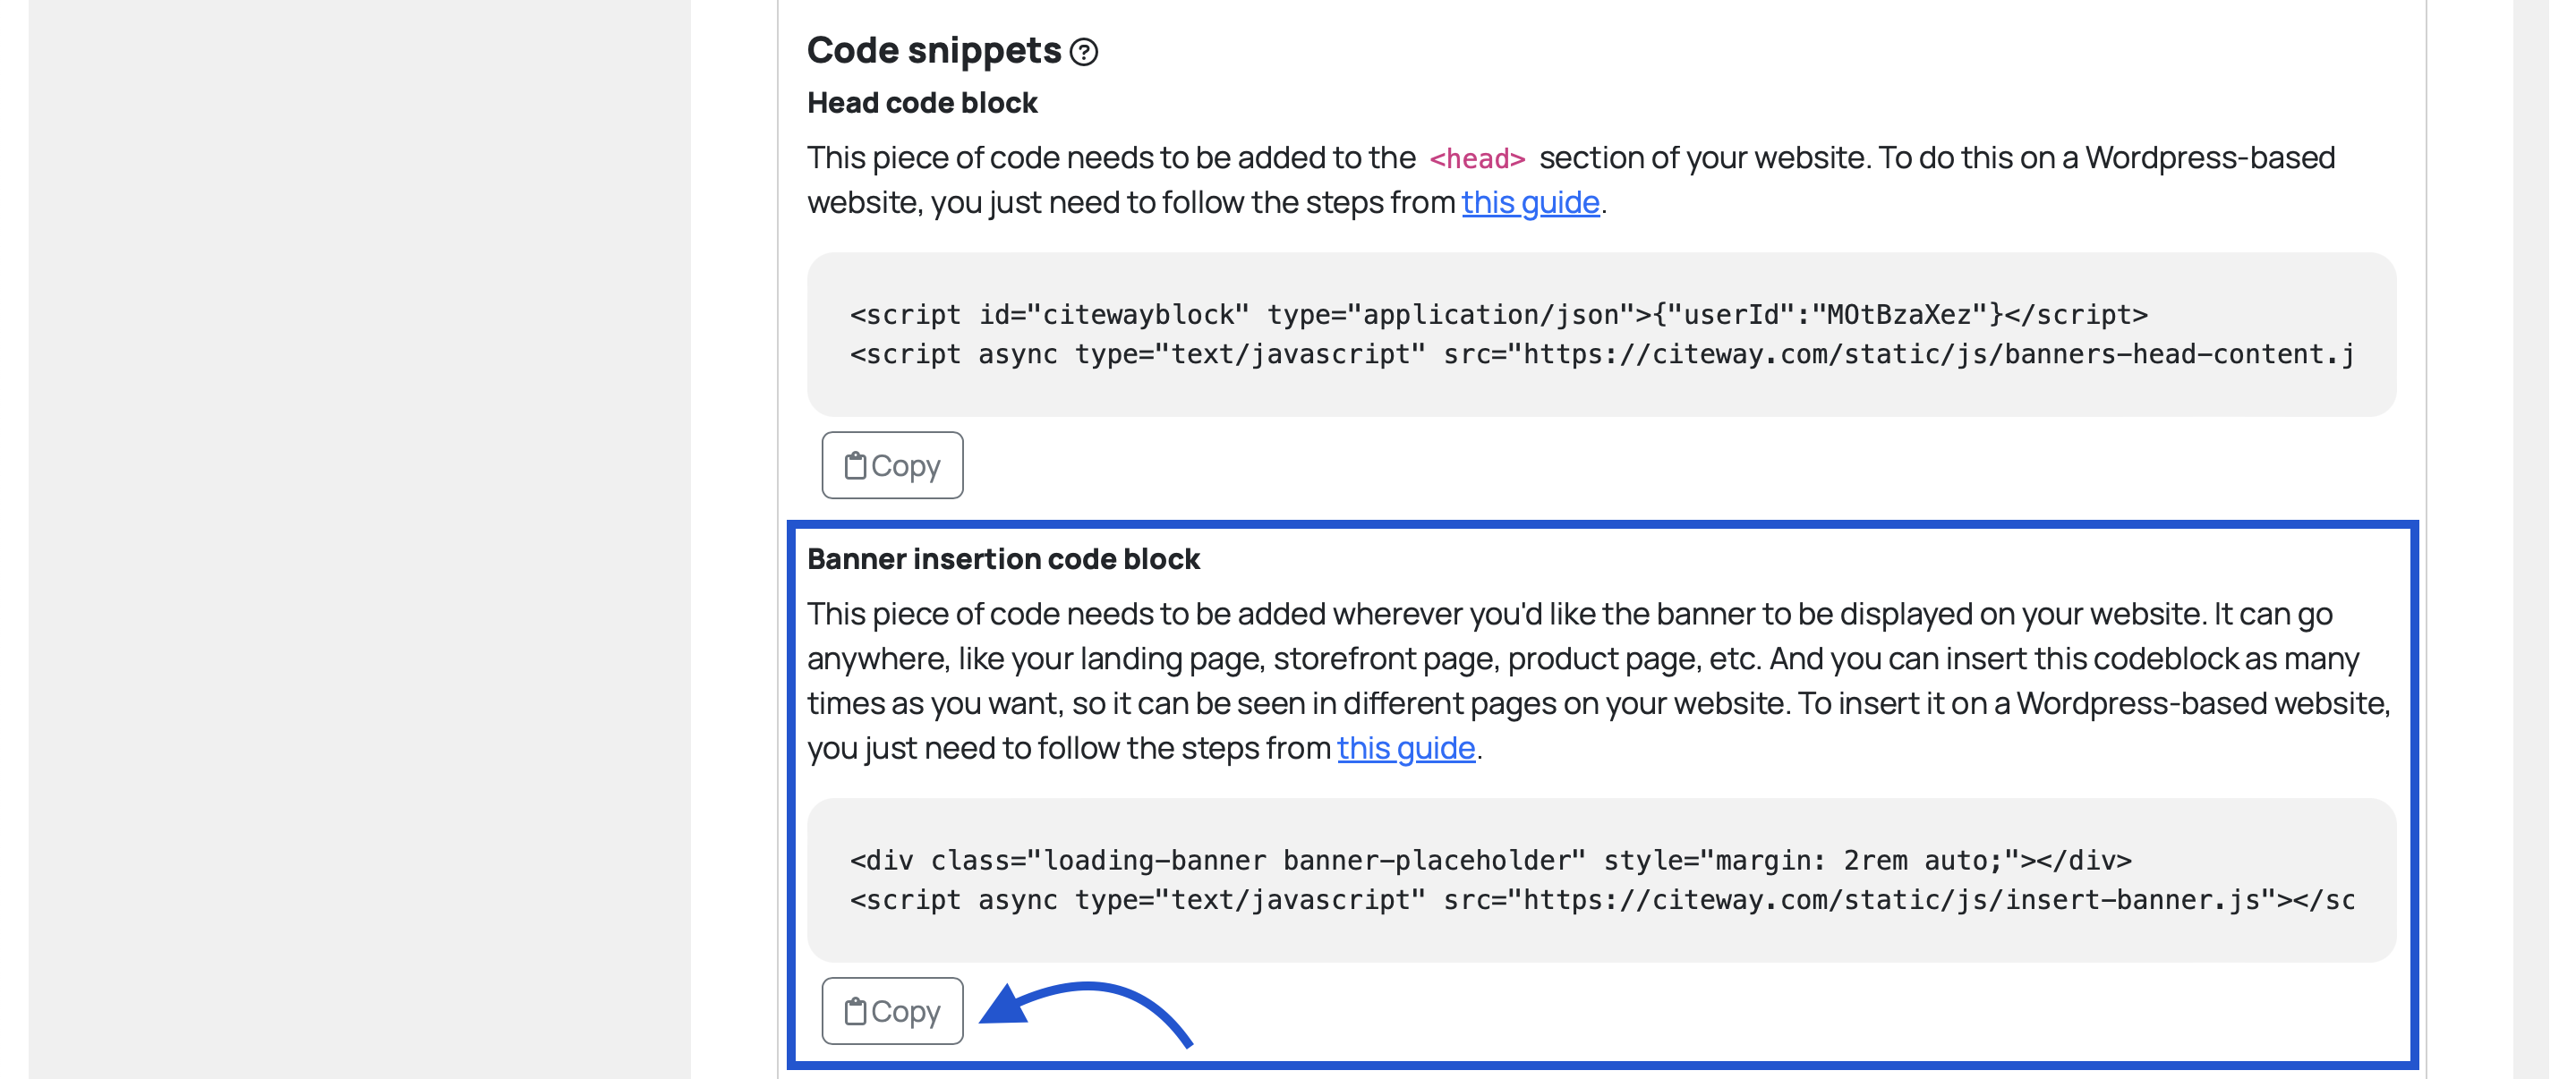
As you may probably be used to doing when designing the looks and content of your Wordpress website, you insert new components to it by adding and customizing blocks to the desired pages. Some people choose plugins like Elementor that make it really easy to customize your site, but it can also be done by editing your current theme. We'll show you how it's done on both cases so that you choose the one you prefer.
If you are used to making your style and layout changes by editing your website's theme, you've most likely already created a Child Theme that let's you keep all your customizations when your main theme is updated. If that's not the case and this is one of the first customizations you make to your site, we recommend you check this link to better understand the usage of a child theme and how to create yours.
To edit your current theme, go to your sidebar menu and click Appearance > Editor.
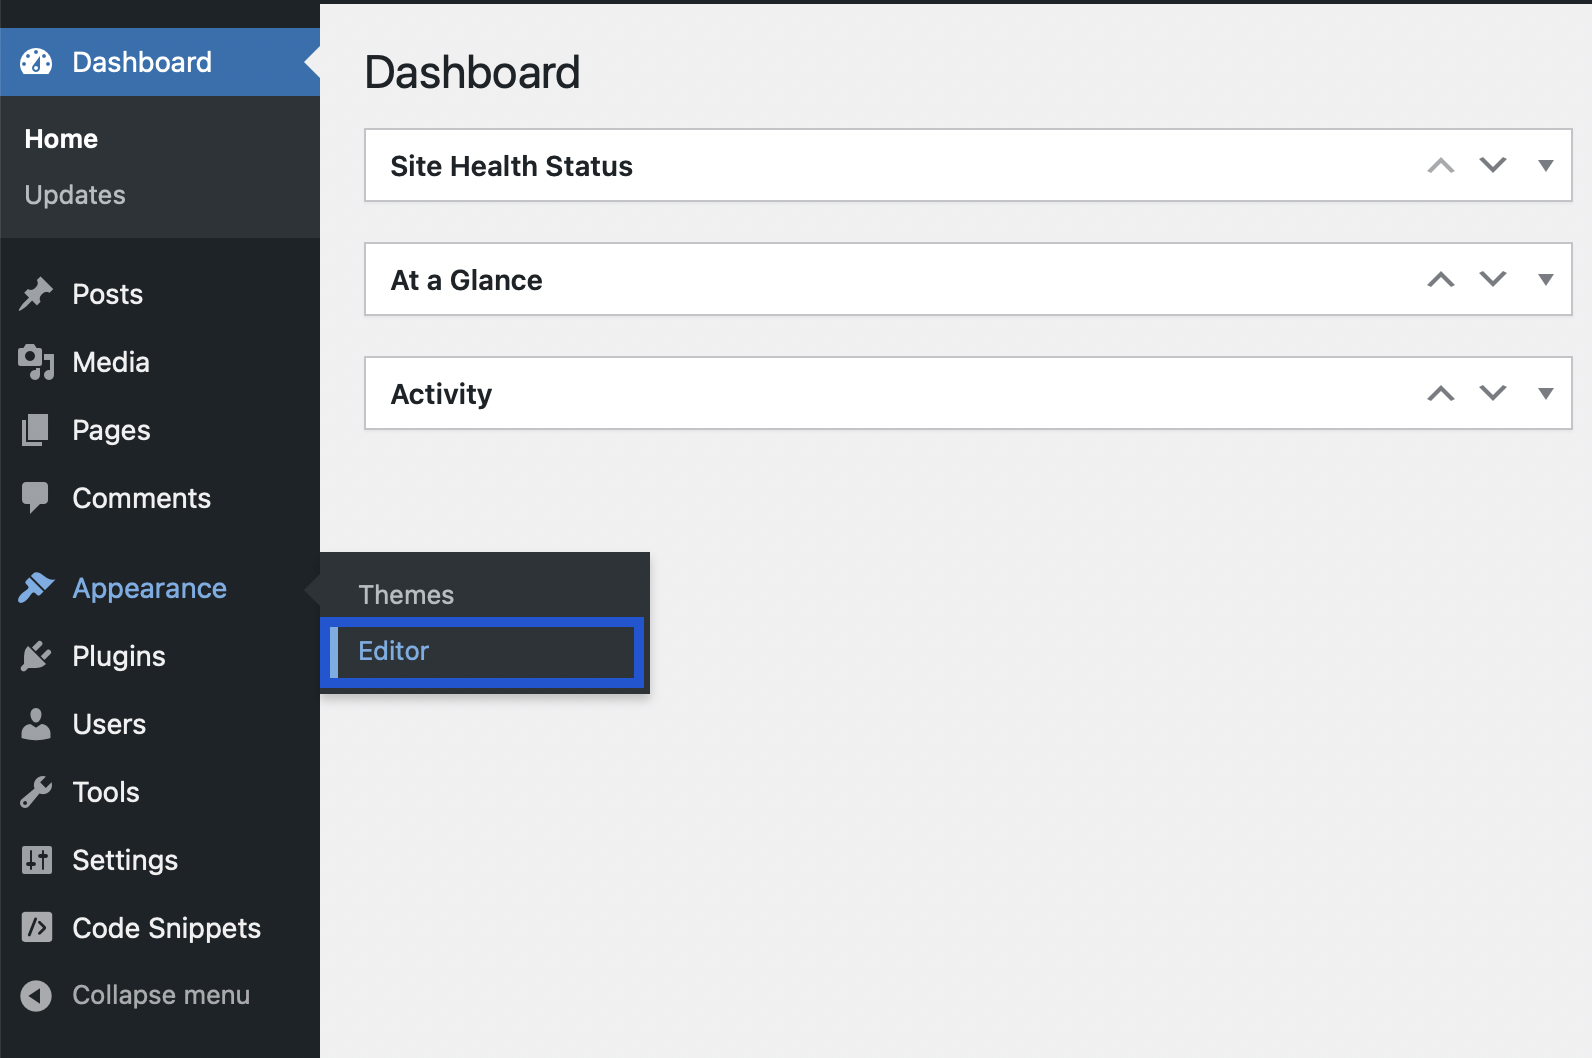
On the theme editor view, you'll be able to access the different pages of your site. Choose the one in which you want to add a Citeway banner, and once selected, click on the page itself to edit its layout and style. You'll see that it gets into editing mode, and hovering over the different sections allows you to edit and redistribute them.
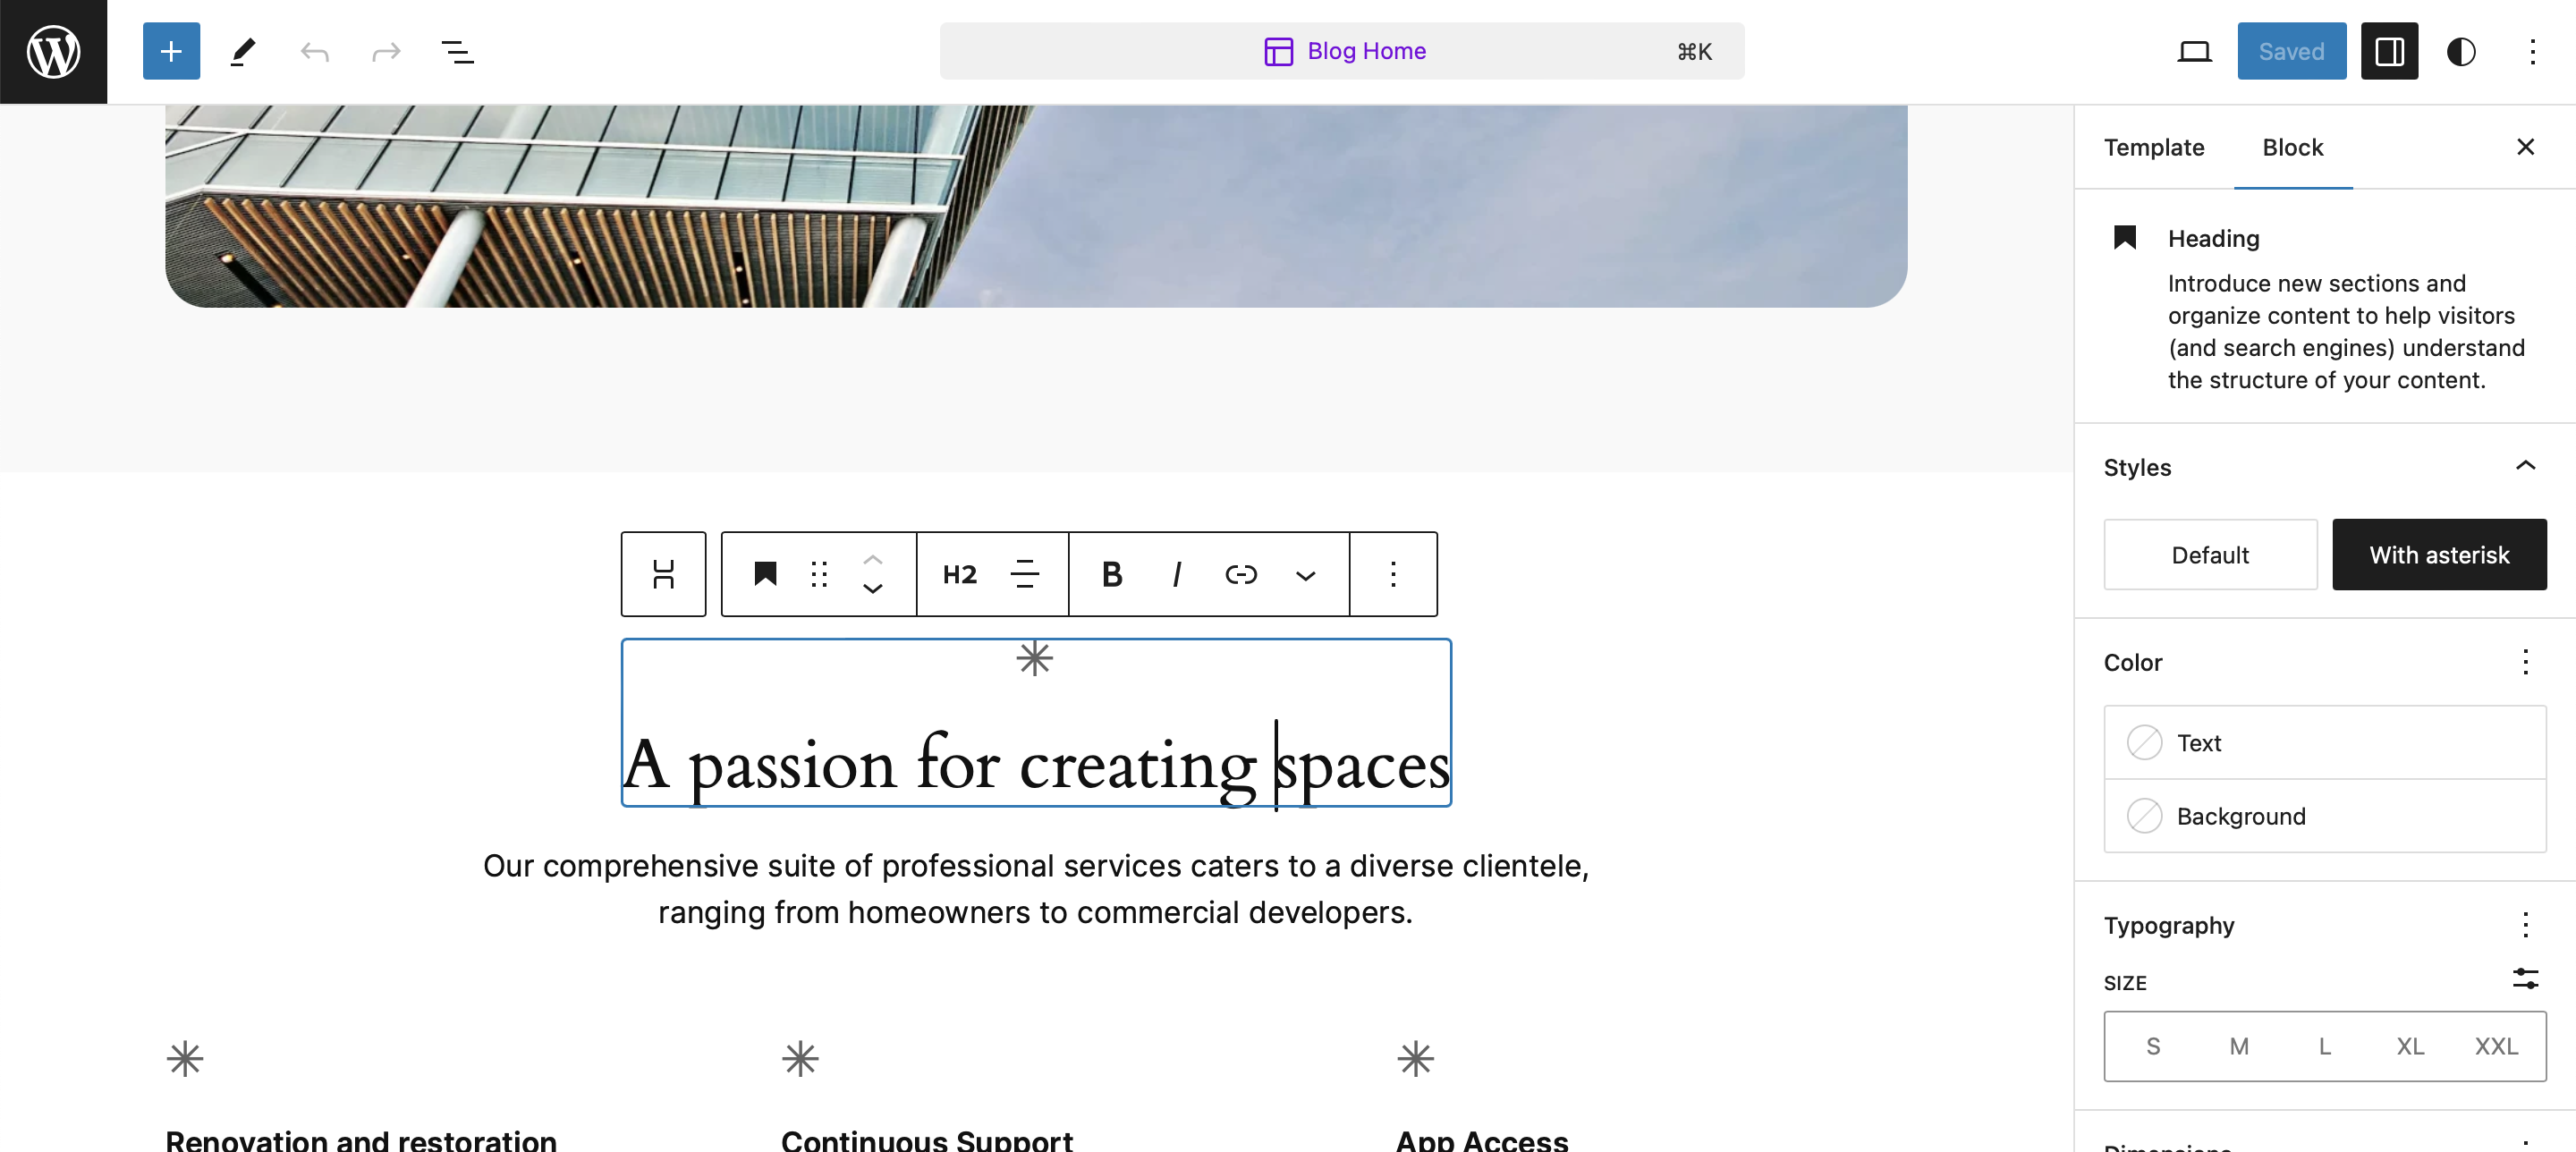
By clicking on the "+" button at the top left of the page, you'll be prompted with different types of sections to choose to add them to your page. Search for the "Custom HTML" type under the Widgets section, and drag it wherever you want to place a Citeway banner. Once placed, you'll have an input field in which to add your banner code: get the "Banner insertion code" you copied from your Citeway dashboard (if you haven't copied it, now it's time to do it), and paste it in the block you just inserted.
Don't worry if you don't see anything on the preview option of this HTML block, just click the Save button and the banner integration will be finished.
Go check your website outside the editor to see your newly implemented banner!
Remember that you can repeat this process of adding a new section and pasting the Banner insertion code block as many times and in as many pages as you want. The banners will be displayed everywhere you choose to add the sections with this code inside them. Also, bare in mind that inserting a block inside an already existing parent section/block in your page can constrain the banner in terms of horizontal margins. If you think it looks too short, drag the section outside of its parent or check the horizontal margin/padding of both blocks.

Congratulations, you've finished the implementation!🎉 If you want to change the style of the banners to better match the looks of your website, go to the section Change banner style on this page.
If you are used to making your style and layout changes using Elementor, this should be really easy for you!
To add a banner to a specific page, go to your sidebar menu and click Pages > All pages. There, select the page you want to add the banner to and click edit.
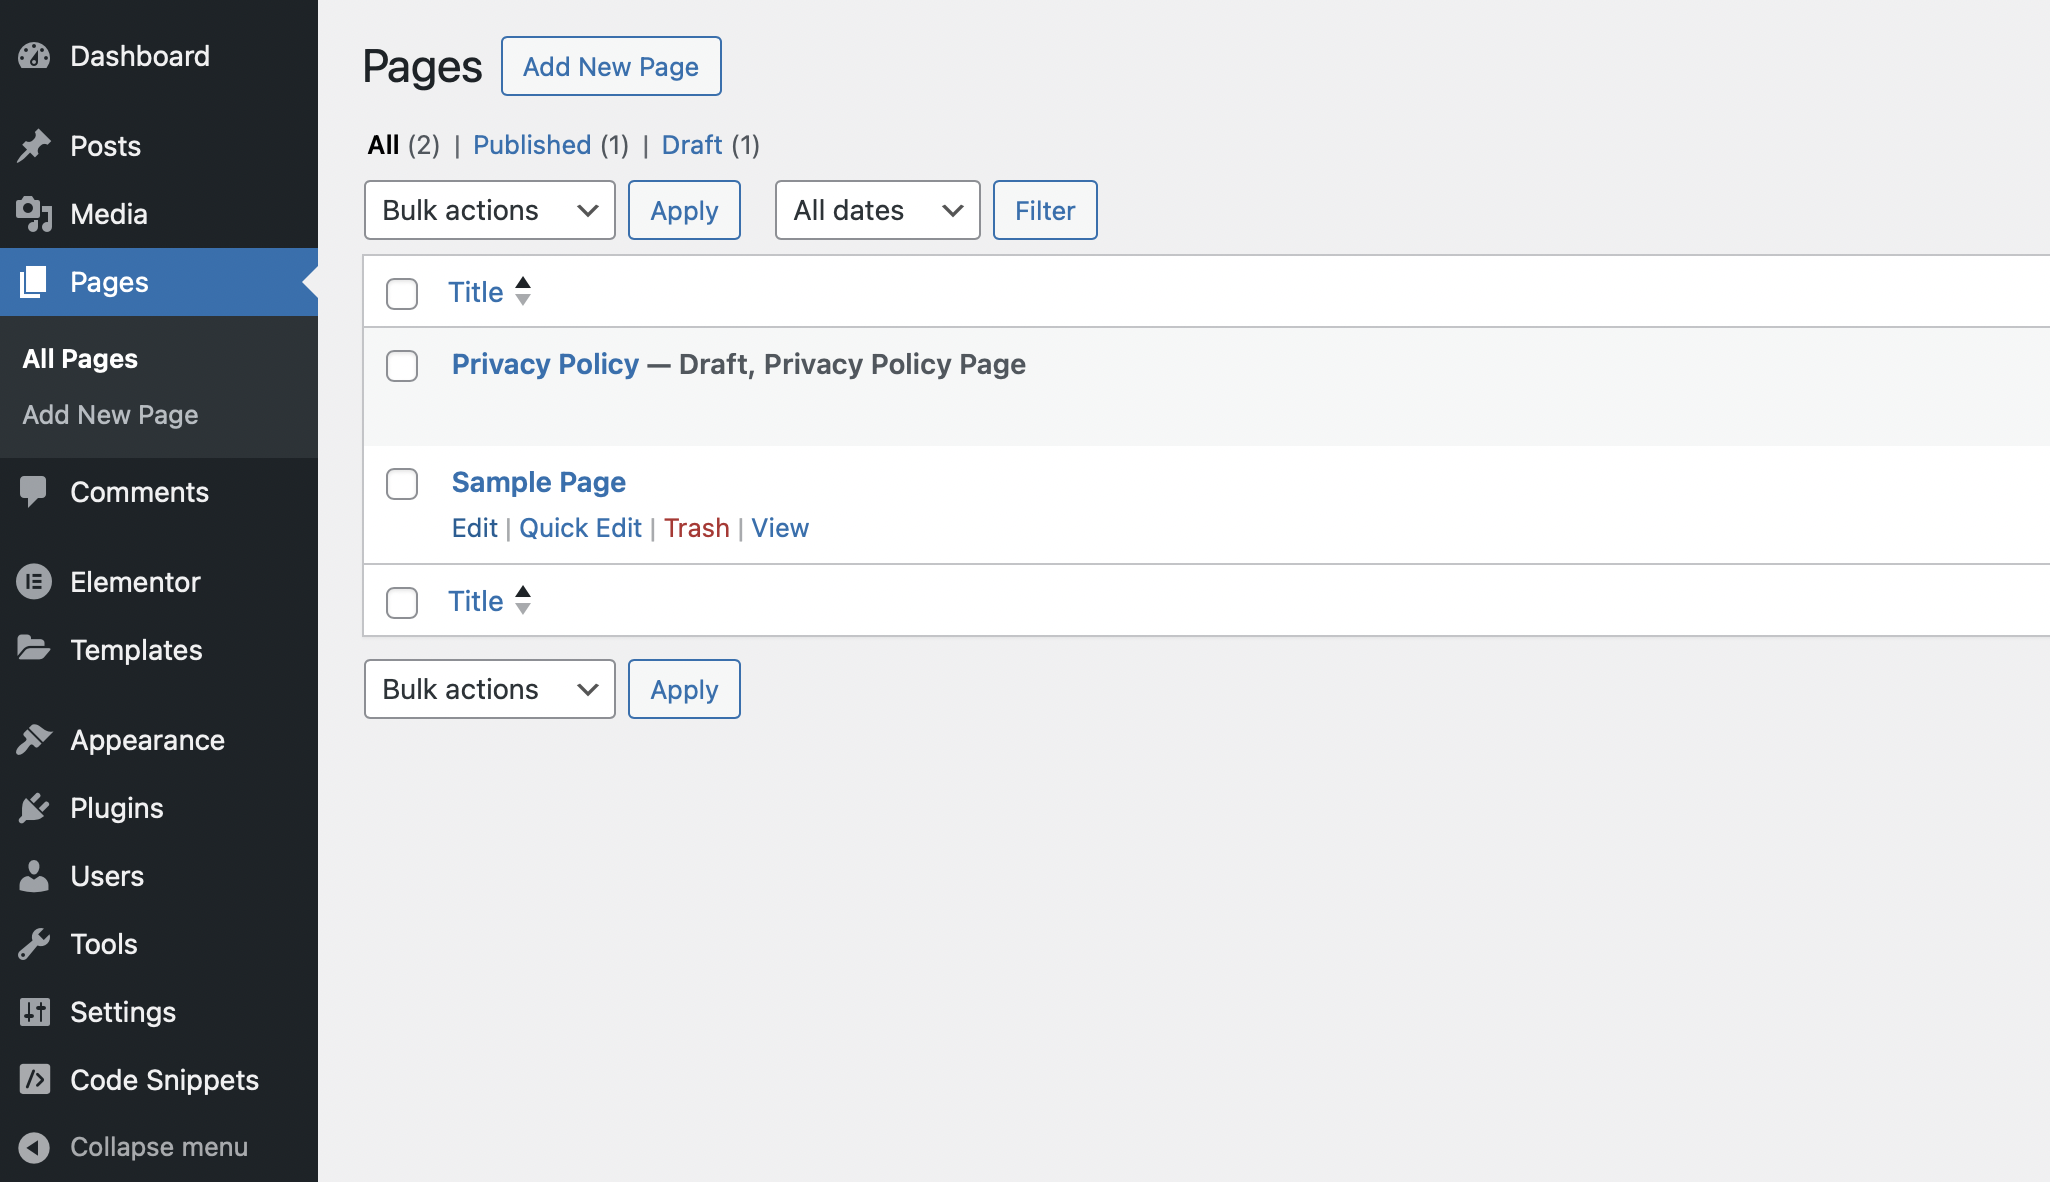
Once you're taken to the Wordpress page editor, click the button at the top of the page that says "Edit with Elementor".
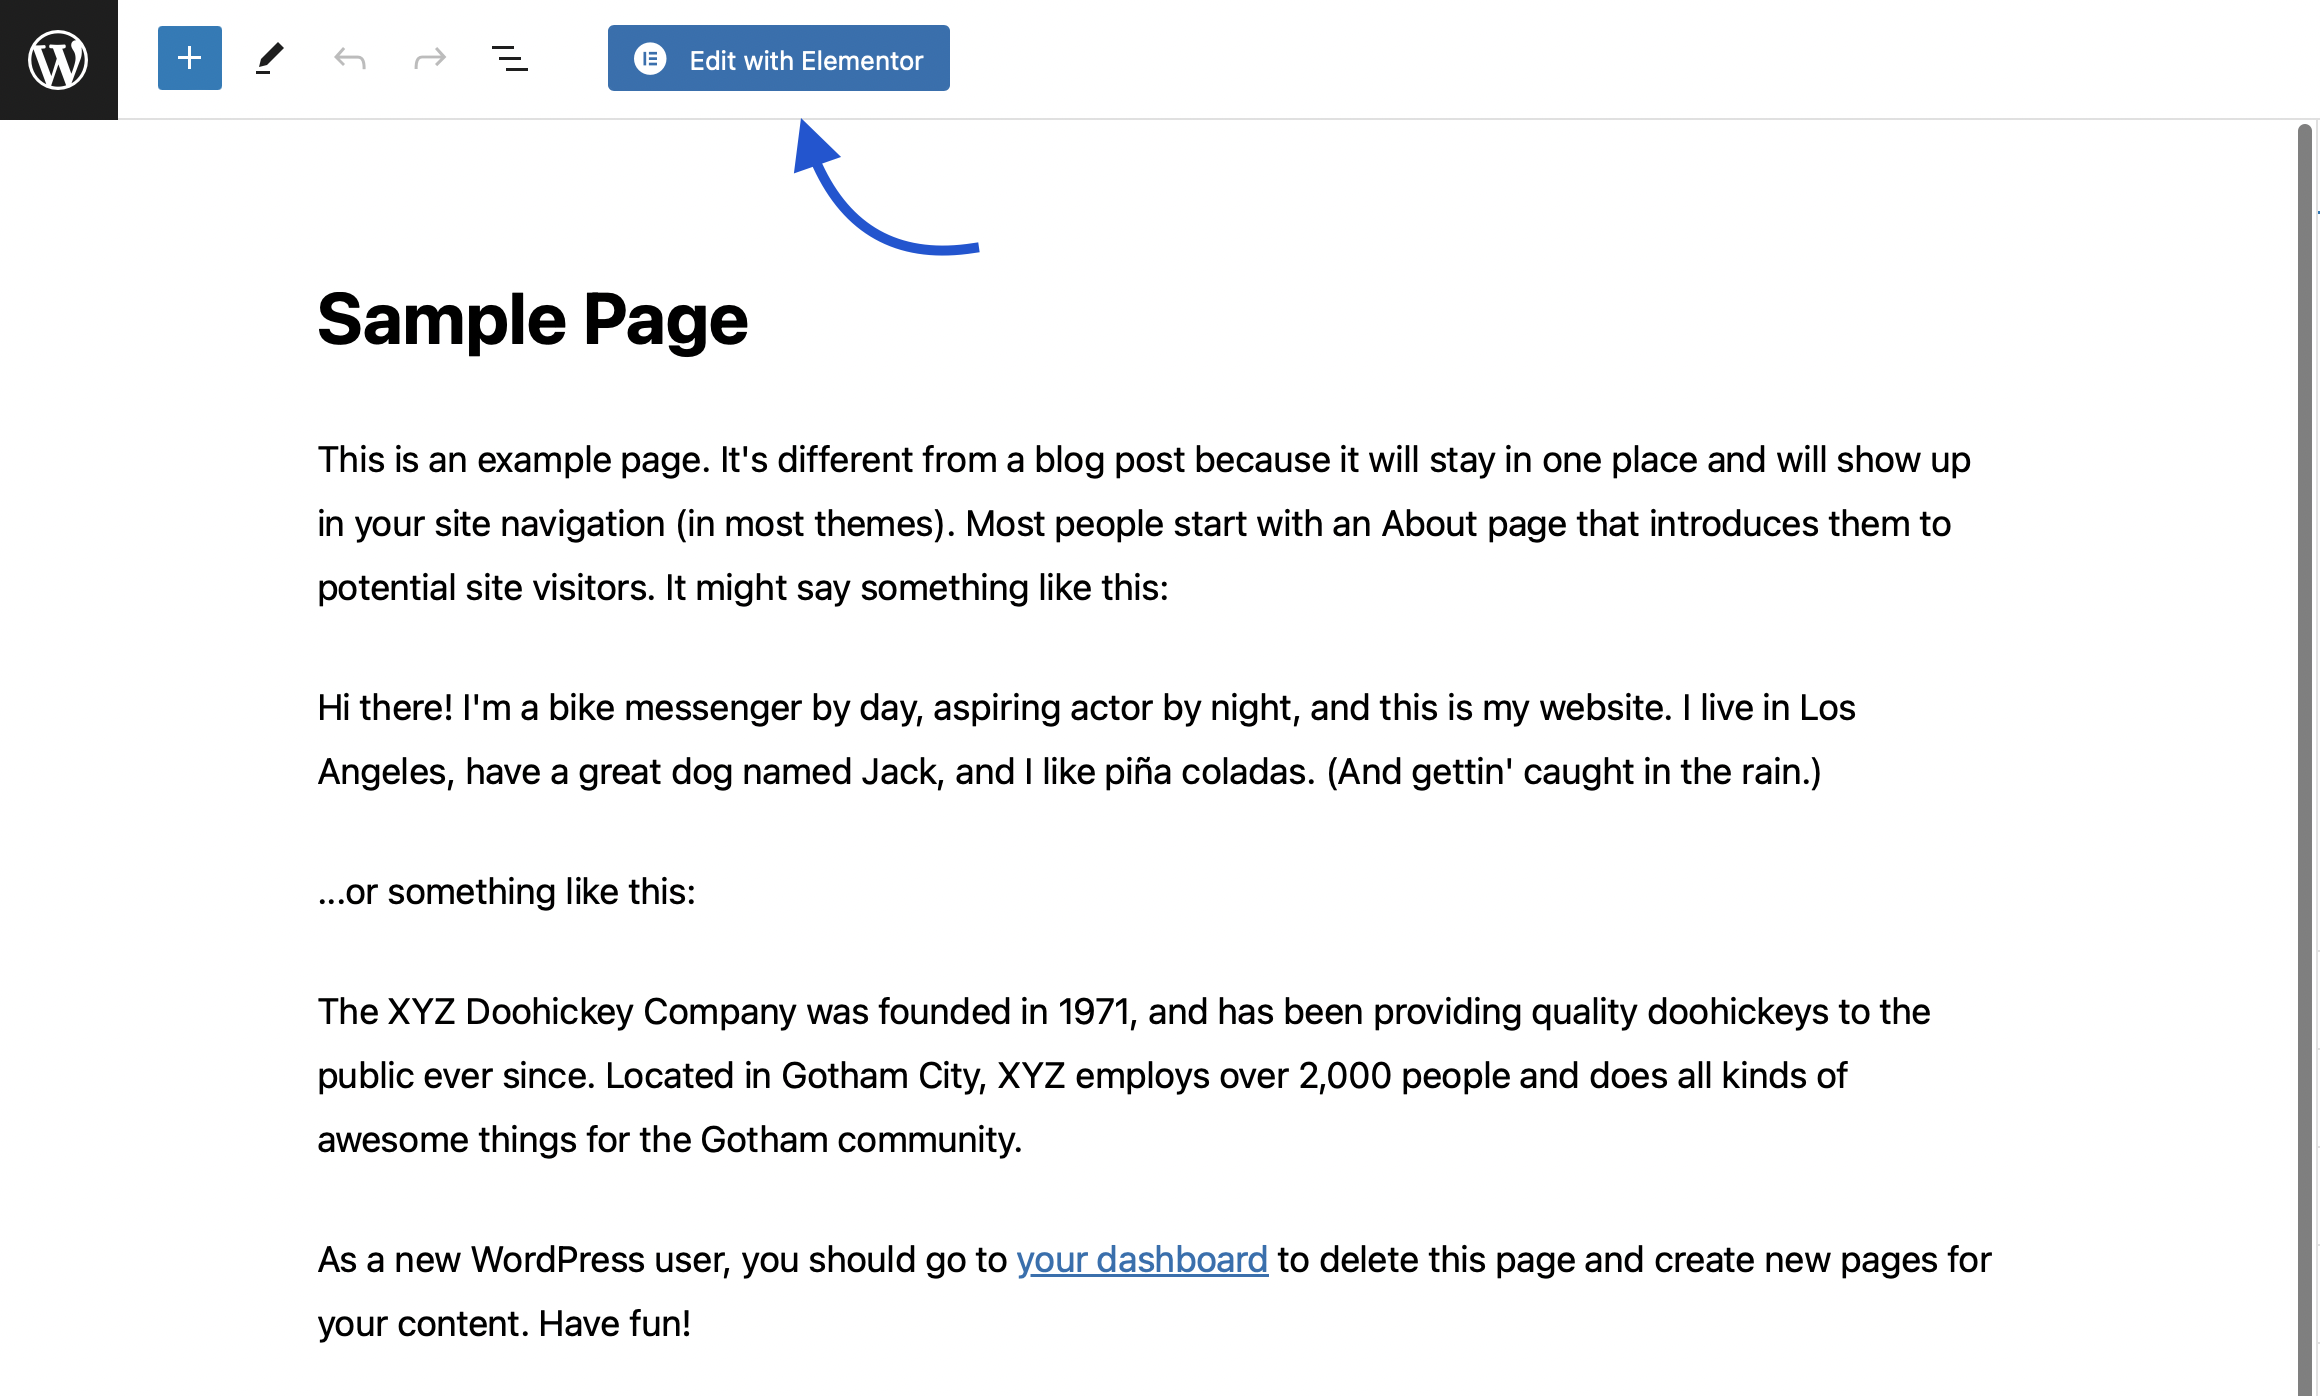
You'll be taken to the Elementor customization interface for the page you've selected, which allows you to add, edit, and relocate the different section blocks that conform your page. Choose where in the page you want to add a Citeway banner, then select the "HTML" type of block, and drag it wherever you want it to be. After that, all you'll have to do is paste the "Banner insertion code" from your Citeway dashboard that you copied a few steps back (if you haven't copied it, now it's time to do it).
And that's it! You can click the preview button below to see how it looks, and you'll see that the banners are already being loaded.
Don't forget to save the changes by clicking the Update button, so that the banner goes live.
Remember that you can repeat this process of adding a new section and pasting the Banner insertion code block as many times and in as many pages as you want. The banners will be displayed everywhere you choose to add the sections with this code inside them. Also, bare in mind that inserting a block inside an already existing parent section/block in your page can constrain the banner in terms of horizontal margins. If you think it looks too short, drag the section outside of its parent or check the horizontal margin/padding of both blocks.

Congratulations, you've finished the implementation!🎉 If you want to change the style of the banners to better match the looks of your website, go to the section Change banner style on this page.
Note: If you have jumped directly into this section, have in mind that to proceed with this step you are expected to have set up your account, created and configured a company profile, and obtained the connection blocks of code that are autogenerated on your Citeway Dashboard. If you haven't reached this level of preparation, we suggest you check the previous steps described in this integrations guide.
If you don't use any of the abovementioned website builders and use HTML instead, the implementation process is very simple. Before you go any further, you should have followed the previously described steps and reached the point where you have included the tags that define your business and selected "Other" as your platform on the Setup section of your company profile.
Below the earlier described fields related to tags and platform selection, you'll find the "Head code block" section. On it, there's a block of code that is specifically generated for your company, and that will only work for this specific website. If you were to repeat this step with different websites, new company profiles need to be created.

This block of code can be copied by clicking the Copy button. All you have to do now is paste it in the <head>
section of your website. It's extremely important that you attach it globally to your site (in other words, that it is
present in every page of your site) and not only to a specific page.
Now that the Head code block has been inserted and activated, all that's left to be done is choose where you want to place a Citeway banner, and paste some code. Let's do it step by step to see how it's done.
As simple as it sounds, just head to your Citeway dashboard, and below the Head code block you'll find the Banner insertion code block. Click on the Copy button for the latter so that you can paste it in your code editor.
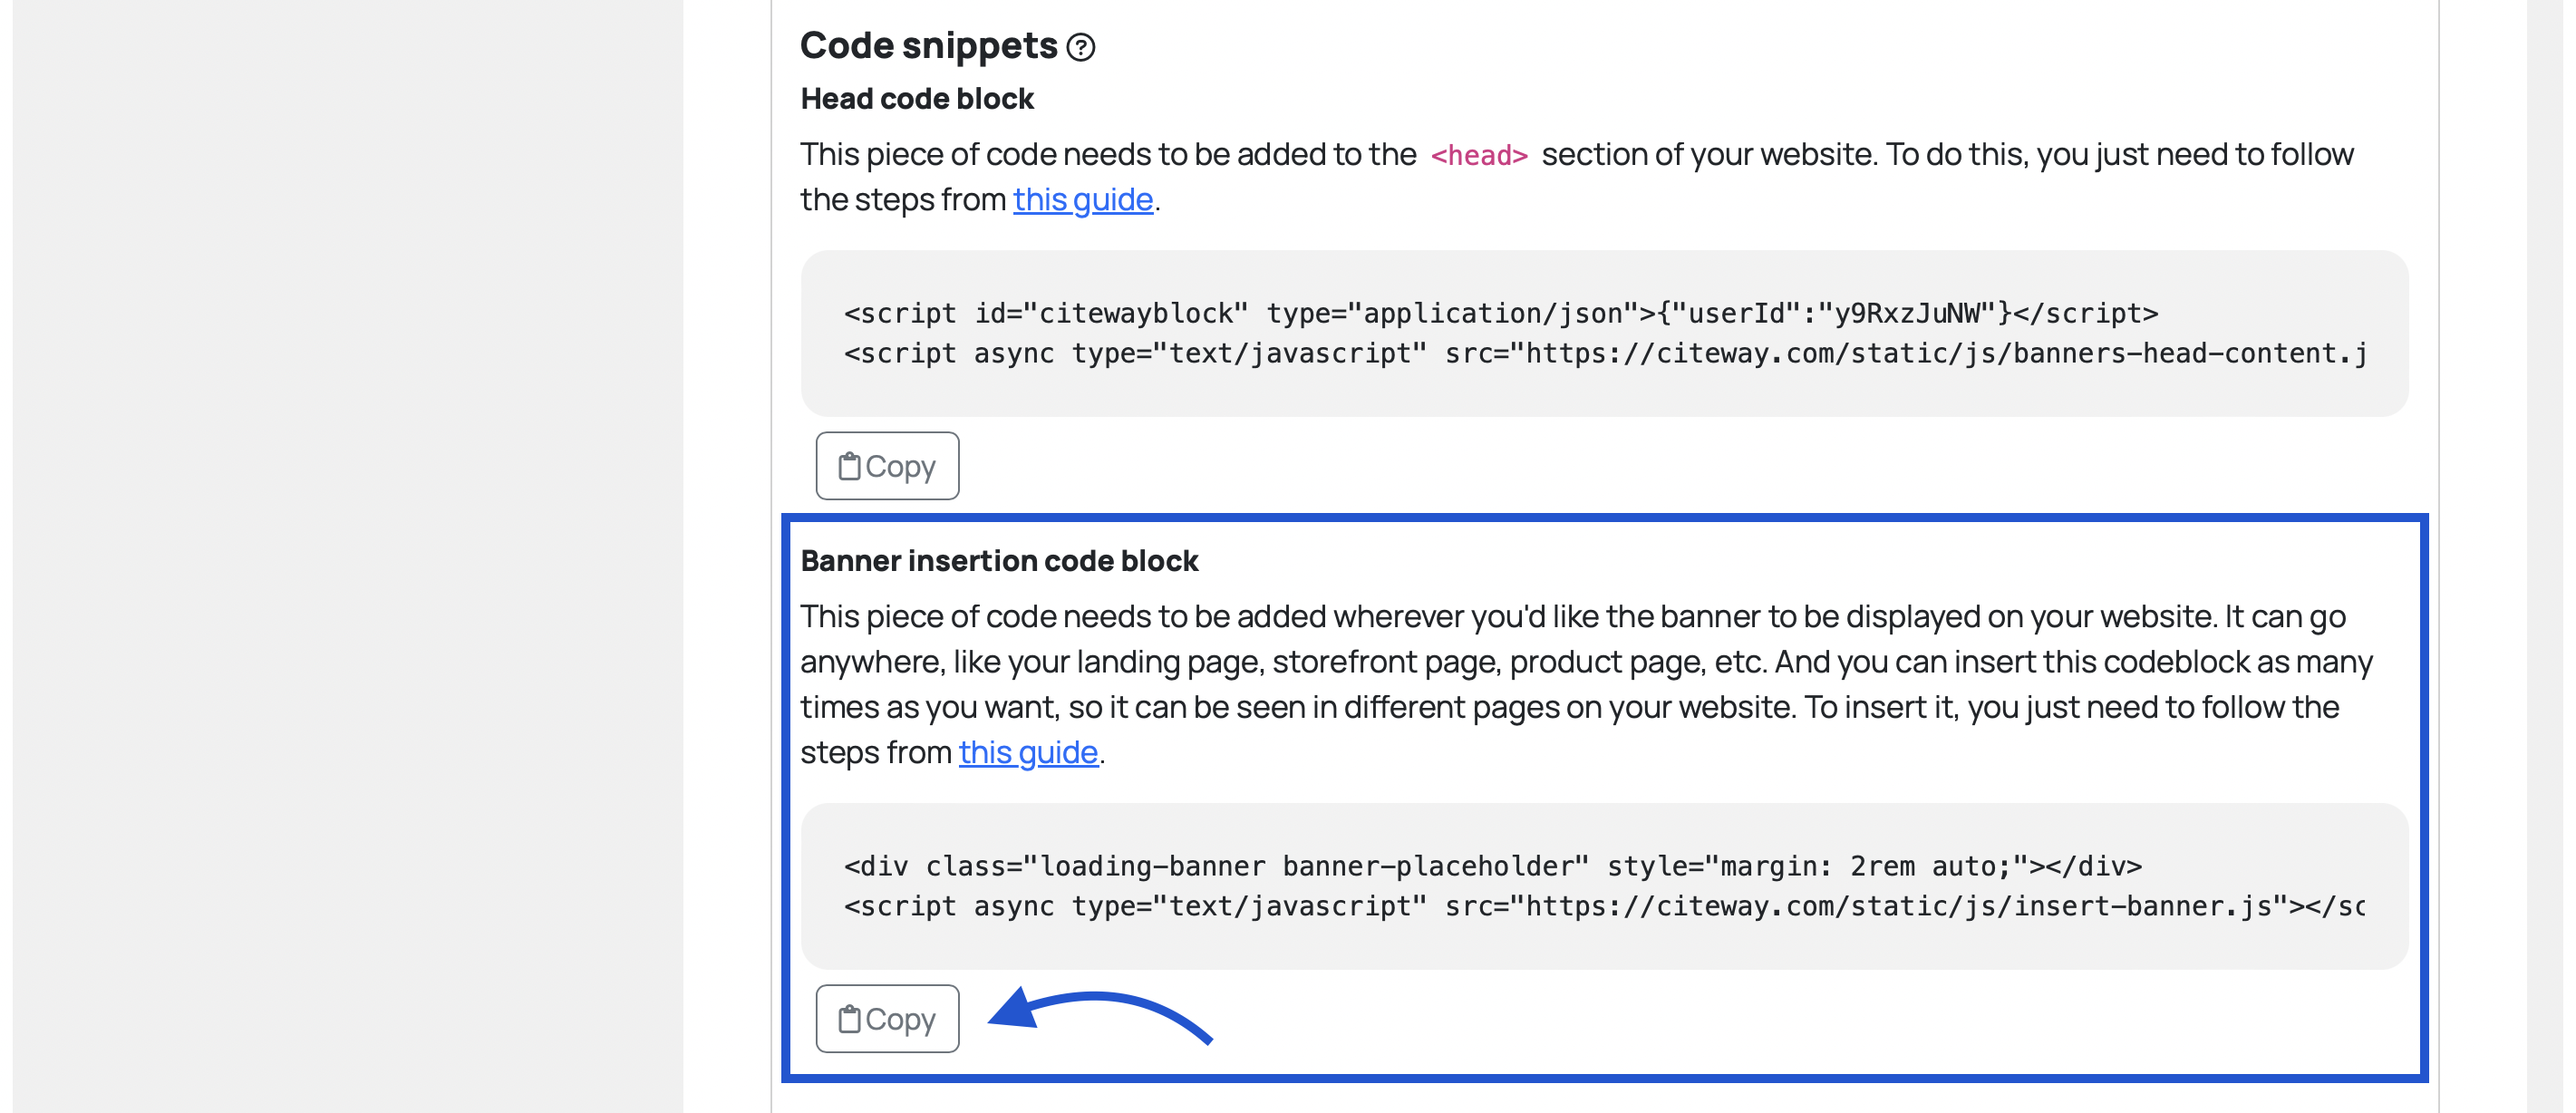
As you may be expecting, all you have to do now is past the codeblock wherever you want a banner to appear. Just
make sure it's in the <body> section of your page. You can add a banner multiple
times in the same page, as well as in different pages.
Important note: if you have used this method of implementation instead of the Shopify and Wordpress ones, make sure not to skip the next section "Selecting your success pages", as it's specially important for websites not built with such methods.
Congratulations, you've finished the implementation!🎉 If you want to change the style of the banners to better match the looks of your website, go to the section Change banner style on this page.
One of the most important features of Citeway is to evaluate which banners are the best at converting your visitors, or in other words: which banners are the most successful. But in order to do that, we need to define first what we consider "success". In many cases, when a visitor of our website reaches the Checkout page, or the Thank you one that's showed after a purchase, we can consider it a successful conversion. However, in other cases a success is considered when a visitor reaches the Subscribed page, or something else.
For that reason, Citeway lets you define the urls of the pages that you consider to be your success indicators. This option can be found in the Setup menu of the company you want to edit, and down into the section "A/B testing success urls".

Don't worry, if you are not sure about how to proceed with the success parameter selection and prefer to leave this part empty, as the success parameters are automatically selected for you based on the platform you've chosen (e.g. Shopify always uses the same url patterns after a checkout is finished). For that reason there's no need for you to enter that information unless you want to add values that are specific to your website.
If instead of Shopify or Wordpress, you've chosen Other as your platform selection, you probably need to pay some extra attention to the "A/B testing success urls" section, as you may have used different url patterns than the ones typically used on Shopify and Wordpress on your success defining pages. Selecting the Default button autofills a series of success url patterns that are common based on your platform selection. After that pre-filling, you can still add, edit, and delete any of the displayed url values.

As you may imagine, the banners created by a user for their company are exclusive to such company and no other Citeway user gets to use them on their websites. For that reason, they are referred to as Private, or self-edited banners.
To create a Private banner, go to your Citeway dashboard and into your company's profile tab, and scroll down to the Self-edited Banners section.
